Showing posts with label Candy. Show all posts

Thursday, June 16, 2011

Why Didn't I Think of This?


Let’s be honest. Who amongst us doesn’t like chocolate chip cookie dough? Personally, I prefer it over the finished, baked cookie. I think it has something to do with that mouth-watering butter/sugar combination and the crunch of brown sugar in the raw dough. And then of course, I believe in the old adage that if you eat it straight from the mixing bowl, it doesn’t count. Yeah right, Liz.

Keep your spoon away, Liz!

In any event, when I’m whipping up a batch of chocolate chip cookie dough, I’m always happy when there is enough of it remaining in the bowl so I can actually bake the things. C’mon, can you really look me in the eye and tell me you’ve never done the same thing?

Ben and Jerry figured this out years ago when they came up with cookie dough ice cream. Someone also decided it would be a good addition to milkshakes. Now I am going to sink to a new low and let you in on a recipe for Cookie Dough Truffles.

Since my cookie-making method usually revolves around shaping the dough into balls and storing them in my freezer until ready to bake, I can’t believe I never thought to make them into truffles. I stumbled onto the concept one recent Saturday after I had been to the gym and was waiting for Henry to get home so we could go out to lunch (that doesn’t count either after an intense workout, right?) With nothing else to do, I flipped the channel to the Food Network and there was this woman making Chocolate Chip Blondies, which she was morphing into several other desserts like Cookie Dough Truffles. Well, well, well!

Are your kids hanging around the house this summer with nothing to do? Make these with them. Except for the fact that they will likely bounce off the walls after consuming one, it’s the perfect thing to make on a sweltering day when you are loathe to fire up the oven.


COOKIE DOUGH TRUFFLES (adapted from Anne Thornton, The Food Network)

4 oz. (1 stick) unsalted butter, softened
½ cup dark brown sugar, packed
¼ cup granulated sugar
¼ teaspoon salt (I used fine sea salt)
1 cup plus 2 tablespoons unbleached, all-purpose flour
½ teaspoon baking soda
1 egg (I used extra-large)
1 teaspoon pure vanilla extract
1 ½ cups mini chocolate chips or chunks
2 12-oz. bags dark chocolate chips, preferably 60%
2 oz. white chocolate
2 oz. milk chocolate

Place butter into the bowl of an electric mixer fitted with the paddle attachment. Beat on high speed until butter is creamy, scraping down bowl once, about 2 minutes. Add sugars and salt and continue beating for about 5 minutes, scraping down bowl several times until mixture is smooth and well-blended. Try to resist the temptation to dip a spoon into it and shovel it into your mouth.

Meanwhile, in a small bowl, whisk together the flour and baking soda. Add the egg and the vanilla to the butter mixture and blend well on medium-high speed. Scrape down bowl, then reduce speed to low. Add the flour mixture in two parts and mix only until just blended. Remove bowl from mixer stand and fold in the chocolate chips (or chunks) with a heavy spatula or wooden spoon.

Pat dough into an oval and wrap well in plastic. Refrigerate until just chilled, about one hour. Use a small ice cream scoop (I used a 1 ½-inch scoop) to shape into balls. Place on a baking sheet and refrigerate at least one hour or until firm.

When ready to assemble, line a baking sheet with parchment and have ready a long skewer. Melt the chocolate chips in a small, deep pan. Use the skewer to spear a chilled cookie dough ball and dip it in the melted chocolate. Let excess drip off, then place ball on the prepared sheet, using the skewer to smooth out the top and cover the hole it made. Repeat with remaining balls, then place tray into the refrigerator for at least 30 minutes or until chocolate sets and is firm to the touch.

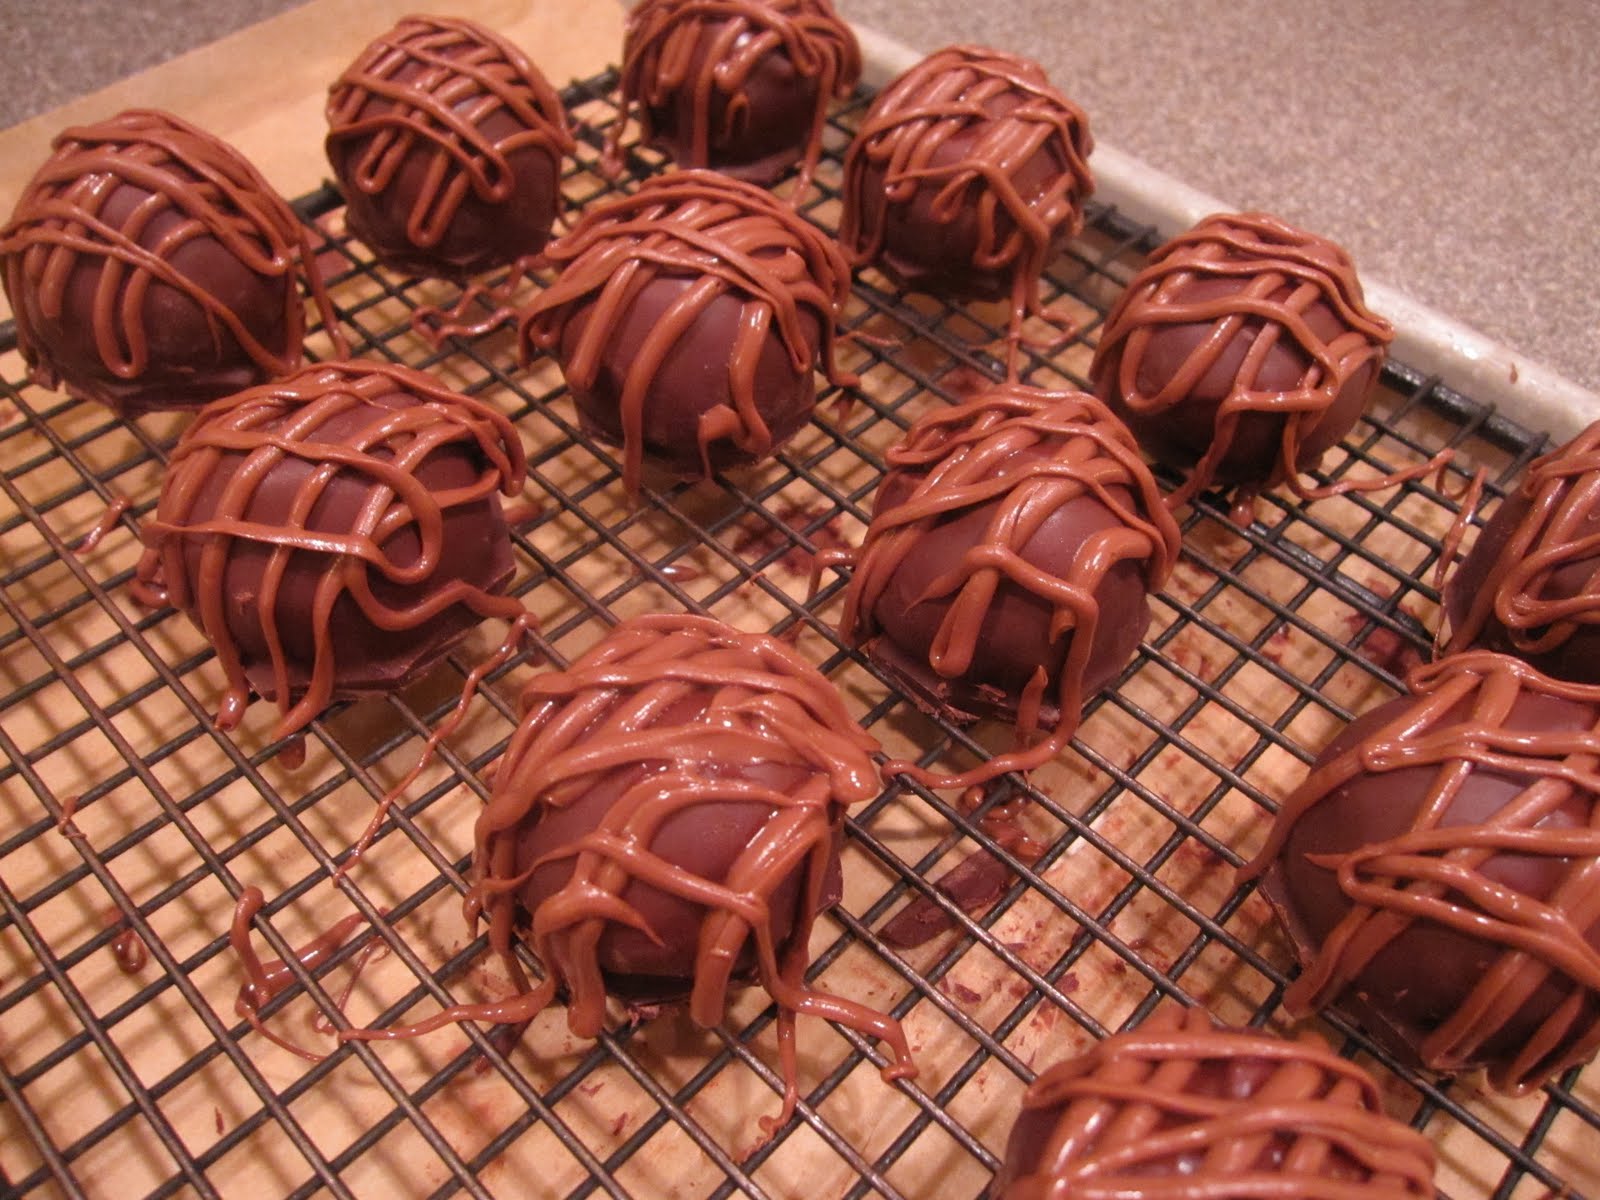
When ready to decorate, place chocolate covered balls on a cooling rack on top of a baking sheet to catch excess chocolate. Melt the white chocolate in a small saucepan over low heat. Place into a plastic pastry bag with a very small hole snipped from the end. Pipe white chocolate over half of the chocolate balls.

Repeat with the milk chocolate and decorate the remaining balls.

Yield:  26 1 ½-inch truffles


*  You will need to store these in the refrigerator, however I recommend letting them sit at room temperature for about 15 minutes before wolfing down serving. 

*  Be creative in your decorating!  Use both kinds of chocolate or roll balls in cocoa, chopped nuts, sprinkles or powdered sugar.  Let your kids decide....

*  The original recipe called for regular chocolate chips, but I think they are too big, which is why I used minis.  I think they give a better ratio of chocolate chips to dough.

*  Don't have a plastic pastry bag?  That's what Ziplocs are for.

*  When you dip the truffles in the melted chocolate, no matter how much you let the excess drip off, you will end up with a puddle of it around the truffle, which will solidify.  By all means, just leave it (means that much more chocolate) but if you are ridiculous like me, you will triim it off before decorating.  And then Henry will bemoan the waste of all those chocolate scraps...

*  I would be remiss if I didn't remind you there is a raw egg in this recipe.  If your health is compromised, you should skip this recipe altogether.  To reduce the risk of salmonella or any other food-borne illness, make sure you use only fresh, properly refrigerated and clean Grade A or AA eggs.  The more you know about where your eggs come from, the less the chance of contamination.

Well, I guess I have blown my Weight Watchers regimen for this week.  On trash food, no less........

Sigh.

Thursday, December 23, 2010

Uh-Oh


Oh, the holidays. You think you have it covered, with gifts for all the folks who make your life work. The yard guys (bless them, especially because we don't own a lawn mower and even if we did, Henry wouldn't know how to use it), the wonderful folks who keep my hair straight and not gray, the lovely people who own the dry cleaning establishment where Henry drops his shirts off every week and the staff at the local bank who knows me by name and always greets me with big smiles.

I can’t say “thank you” with cash. It wouldn’t be appropriate and besides, I don’t have any extra anyway. Who does? So instead I cook and bake. This year’s offerings include both English Toffee and Honey Pecan Bars (recipes previously posted, here are the links):

http://nevertrustaskinnycook1.blogspot.com/2009/12/christmas-trees-and-hannukah-candles.html

http://nevertrustaskinnycook1.blogspot.com/2010/09/will-bake-for-eggs.html

And it’s all good and you make enough to cover the folks on your list and then……..oh no! You forgot someone (or two or three) and you’ve blown through all of your toffee and pecan bars. Well, crap.


Here is the quick fix answer: Salted Cashew Brittle. I’ve had this recipe in my arsenal for years. It’s ridiculously easy and I’m almost sorry to post it because you will certainly start to doubt my food integrity as this involves the use of a microwave.

Okay, yes, I do have one. A microwave that is. Serious restaurateurs would undoubtedly look askance at that, but there you are. It comes in handy for melting chocolate, reheating my coffee in the morning when I don’t finish it quickly enough and softening up the dog food (because that snaggle-toothed dog of mine can’t eat dry food).

So Tuesday night I dragged out my recipe for the cashew brittle, nuked up a batch and patted myself on the back for my ability to come up with something fast and easy to the rescue. I set it out to cool, broke it into big pieces and packaged it up. Mission accomplished.

SALTED CASHEW BRITTLE

2 cups roasted, salted cashew halves (1 - 9.5 oz. can)
1 cup granulated sugar
½ cup light corn syrup
1 tablespoon unsalted butter
2 teaspoons pure vanilla extract
1 teaspoon baking soda

Line a baking sheet with parchment or waxed paper and grease well. Alternatively, you can line it with a silicone baking sheet (Silpat).

Combine cashews, sugar and corn syrup in a 2-quart glass bowl. Place in microwave and heat on high, uncovered, for 3 minutes. Stir, then heat for another 3 to 4 minutes until mixture is a very light golden brown.

Carefully remove bowl from the microwave (I suggest using a good pair of oven mitts for this) and stir in butter and vanilla extract. Return to microwave and cook on high heat for another 2 to 4 minutes until mixture becomes caramel-colored.

Remove from microwave and stir in the baking soda. Mixture will become light and foamy. Turn out onto prepared baking sheets. It will be fairly thick, so work quickly to spread it out with a spatula.

Let stand until completely cool, at least 30 minutes. Break into pieces. Brittle will keep up to one week stored in an airtight container.

Yield: enough to completely fill an 8 x 3-inch round tin (3#)

There are two things I would caution you about.  The first is to be very, very careful when handling this stuff as it (and the bowl) gets extremely hot.  As I said before, it's best to use heavy-duty oven mitts.  I would also recommend using one of those 2-quart Pyrex glass measuring cups with a handle (which I thought I had but couldn't find  - think it's buried in the garage amongst all of my old catering equipment). 

The other thing to bear in mind is the fact that not all microwaves are created equal.  Yours may be higher-powered than mine and so forth.  I would therefore recommend that after you add the butter and vanilla extract, check the mixture every 30 seconds or so.  You want it to become caramel-colored but you do not want to take it too far or you will have a big, burned up mess in your microwave. 


Dump it in and stir

After a 3-minute zap

After 6 minutes

Add baking soda


Let harden for 30 minutes

Wrap it up and you're good to go!

Here's the interesting part.  I made this on Tuesday night.  Wednesday morning I settled in with my cup of coffee and the weekly Dining Section of the New York Times.  Look what was on the front page!


http://www.nytimes.com/2010/12/22/dining/22curious.html?ref=dining

It's an article by Harold McGee about the efficiency of using a microwave to produce homemade candy!  There is even a recipe (similar to mine) for Microwave Nut Brittle.  Guess I was ahead of the curve and didn't even know it!

Tuesday, July 13, 2010

Candyland


If you live in Atlanta, can I make a request?  Would you PLEASE invite me to dinner at your house?

That's because no one ever does.  For some very strange and sad reason, people are intimidated to cook for me.  C'mon, I'm just human.  I'm not a professional chef and I like to eat just as much as you do.  Anything you cook for me would be gratefully appreciated.  My friend Scott Peacock (who is one of the best chefs ever) once said he didn't care if someone invited him to dinner and served beanie-weenies; he just appreciated the opportunity to sit down at a table with friends and share a meal.  I concur.

So thank you Shawn and Michael (along with Finn, Aidan and Tristan).  You invited us to dinner and it was awesome.  It could have been beenie-weenies and that would have been just fine.  Instead, you served up bruschetta with gorgeous tomatoes, succulent grilled pork tenderloin, watermelon salad with feta and Kalamatas, mango salad with corn, cilantro and lime and orzo salad with lovely tomatoes (from your garden) and avocado.  I can't think of a better summer supper.  And I loved that we ate it at your kitchen table because your dining room table was covered up with a jigsaw puzzle!  Oh, and we didn't mind that amazing bottle of Silver Oak cab either...

If you invite me to dinner, I will (of course) bring dessert.  Way too much of it, I might add.  If one dessert is good, then two are better.  Nah, don't stop there, Liz.  How about five?

Given the fact that Finn, Aidan and Tristan are growing boys, I figured my peanut butter bars would be a slam dunk.  They were.  If you missed the recipe, here's the post for it:

http://nevertrustaskinnycook1.blogspot.com/2010/06/good-times-bad-times.html

I also made oatmeal chocolate chunk cookies, but that's a subject for another post.  This one is all about candy.  What kid doesn't love it? So in that spirit, I made marshmallows, salty caramels and peanut brittle.  Something for everyone!


MARSHMALLOWS

Have you ever made these?  If not, you should because they are SO fun to make.  They start with just a little blob of stuff in your mixer and they end up being fluffy and light.  Pure magic....make them with your kids.

24 gelatin sheets (this translates into 5 1/4-oz. packets of unflavored gelatin)
1 1/2 cups cold water
3 cups granulated sugar
1/4 cup light corn syrup
1/8 teaspoon salt
3/4 cup cold water
1 tablespoon pure vanilla extract

Place gelatin in the bowl of an electric mixer fitted with a whisk attachment and pour the 1 1/2 cups water over to soften.

Meanwhile, combine sugar, corn syrup, salt, remaining water and vanilla in a saucepan.  Bring to a boil over high heat, then reduce heat and continue to cook until mixture reaches 238-degrees (you will need a candy thermometer for this).
Pour hot mixture over the gelatin mixture in the mixing bowl. Turn speed to "high" and beat until mixture turns white and the bowl is cool to the touch.  This will take 10 - 15 minutes. (A word to the wise here - drape your mixer with plastic wrap until the mixture gets thick, otherwise the stuff will end up all over your kitchen and result in a big, sticky mess.  Not fun).

Turn the marshmallow mixture out onto a baking sheet lined with parchment and coated well with cooking spray.   Oil your hands and spread the mixture out into an even layer.  Cool, then dust liberally with confectioner's sugar.  Wrap in plastic until needed.

When ready, cut into squares, using a serrated knife.  Dip each square into confectioner's sugar to coat, then dust off.  Store as needed for up to 3 days.

Yield:  24 squares


When I worked at Star Provisions, we used these marshmallows to make S'mores.  Let me know if you want details.  Also, if you want to purchase gelatin sheets (I prefer them to the powdered version), here's where I buy them:

http://www.kingarthurflour.com/shop/items/sheet-gelatin-20-sheets


SALTY CARAMELS (From my food maven, Ina Garten)

1/2 cup granulated sugar
1/4 cup light corn syrup
1/2 cup water
1 1/2 cups heavy cream
5 tablespoons unsalted butter
1 teaspoon fleur de sel (French sea salt), plus more for sprinkling
1/2 teaspoon pure vanilla extract

Line the bottom of an 8-inch square baking pan with parchment paper to overhang the sides.  Grease paper lightly.

In a deep saucepan, combine the sugar, corn syrup and 1/2 cup water.  Bring to a boil over medium-high heat then continue to boil until the caramel is a warm golden-brown color.  Do not stir - just swirl the pan to mix.  Watch carefully as it can burn quickly at the end.

In the meantime, bring cream, butter and 1 teaspoon of the fleur de sel to a simmer in a small pan over medium heat.  Remove from heat and set aside.

When the caramelized sugar is the right color, slowly add the cream mixture to the caramel.  Add the vanilla extract.  It will boil up violently.  Cook over medium heat until the mixture reaches 248-degrees.  (Note to self - keep it on medium heat.  If you cook it over high heat, you will burn both the mixture and your pan beyond repair.  I know, because I didn't follow the directions and ended up throwing both the mixture and the pan away.  Learn from my mistakes, people!).

Pour the hot caramel mixture into prepared pan.  Refrigerate until firm
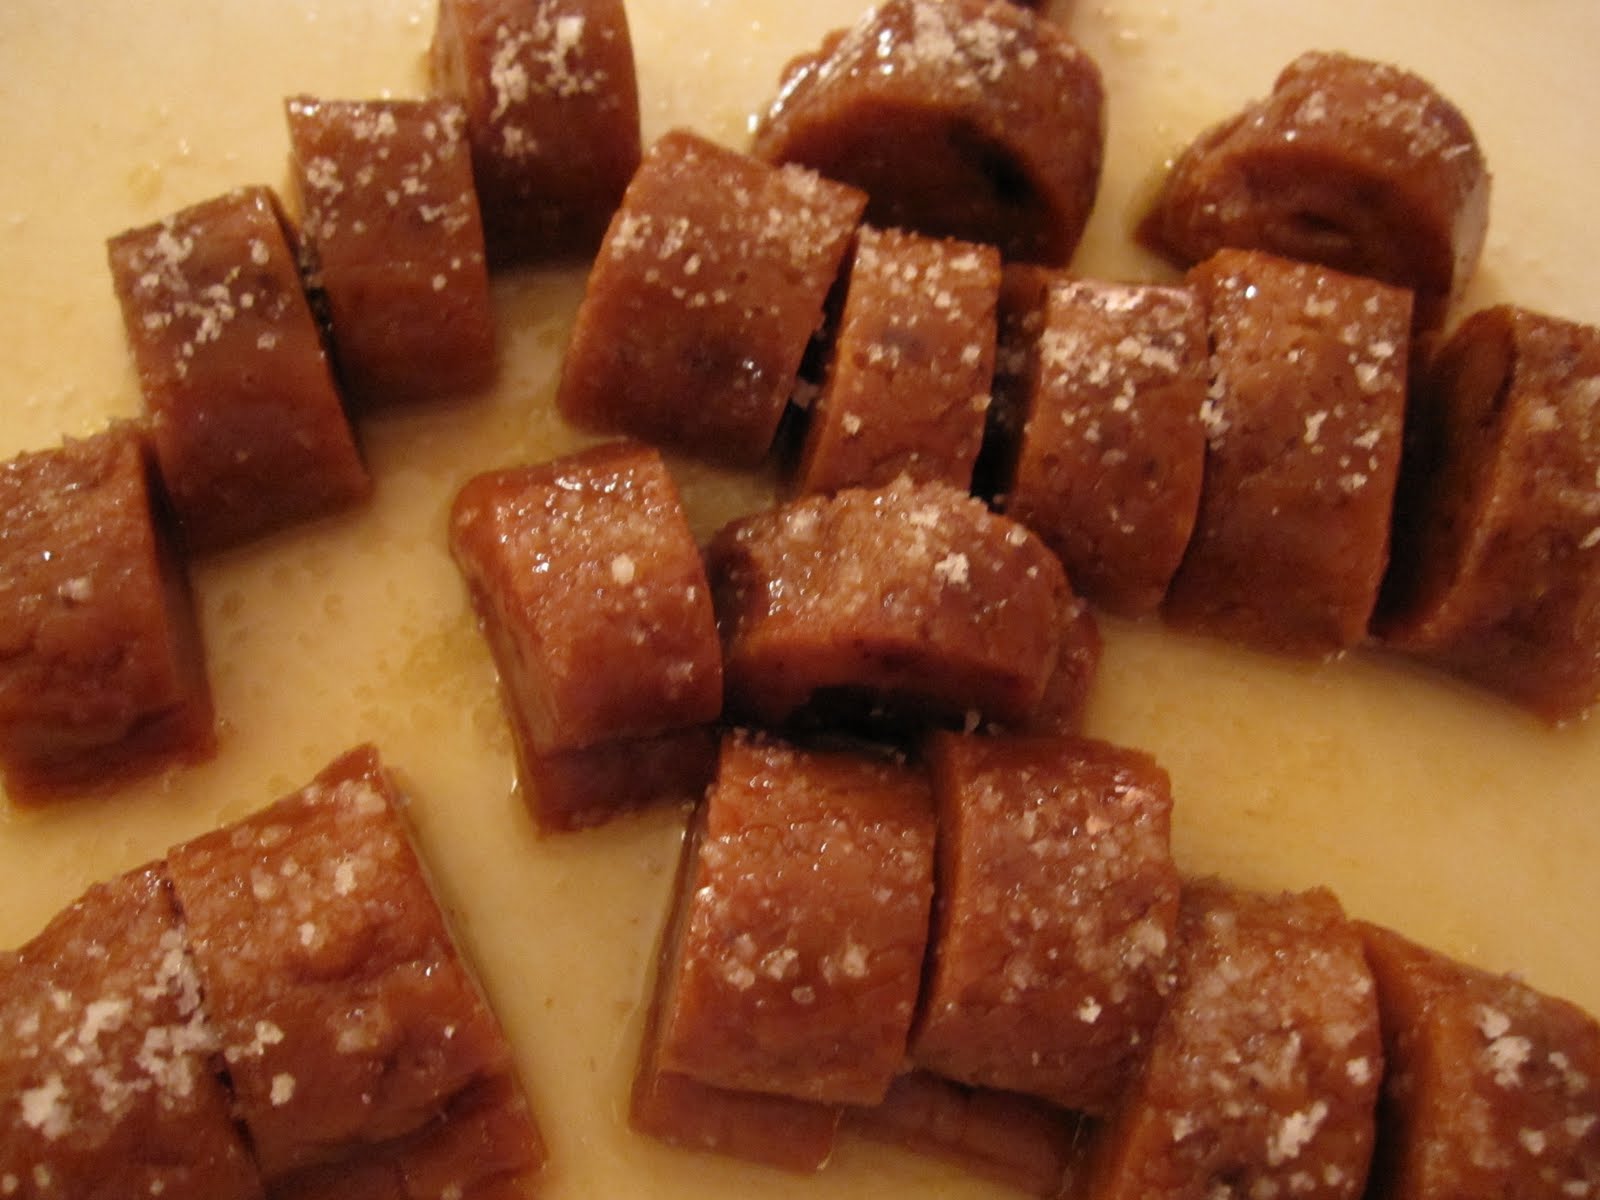
When caramel is cool, use the parchment paper to pry the sheet from the pan onto a cutting board.  Starting at one end, roll the caramel up tightly until you have rolled up half of the sheet.  Roll up the second half in the same manner, then cut the sheet across in the center where the rolls meet.  You will end up with (2) 1 x 8-inch logs.  Sprinkle each log with additonal sea salt, the cut each log into 12 pieces.

Cut parchment paper into  6 x 4 1/2 inch squares.  Wrap each caramel in a paper, twisting ends.  Store at room temperature.

Yield:  24 pieces


PEANUT BRITTLE

This recipe is ridiculous, as in it's so easy.  I'm not a big fan of microwaving anything, but it works for this recipe.  Please forgive me for this shortcut but in truth you should thank me because this recipe is so simple yet so good.  At least it doesn't involve a cake mix! (there are depths to which I will NOT sink).

2 cups roasted, salted peanuts
1 cup granulated sugar
1/2 cup light corn syrup
1 teaspoon unsalted butter
1 teaspoon pure vanilla extract
1 teaspoon baking soda

Stir the nuts, sugar and corn syrup in a large microwavable bowl (preferably Pyrex).  Microwave, uncovered on high until mixture is light brown, about 6 to 8 minutes.  Stir well, halfway through.

Remove nut mixture from microwave (be careful, it will be hot) and stir in butter and vanilla.  Return to microwave and cook on high for another 2 -4 minutes until mixture becomes caramel-colored.

Use oven mitts to remove the mixture from the microwave.  Add the baking soda and stir quickly until mixture is light and foamy and baking soda is mixed in.  Pour onto a baking sheet lined with a silpat or greased parchment paper and spread out with an offset spatula.  The mixture will be thick, so work quickly.  Let cool for at least 30 minutes.  Break into pieces and store in an airtight container for up to 1 week, depending upon humidity.

Yield:  16 - 25 pieces

Those sweet boys (picture to follow in another post) LOVED  these desserts!  Of course, we felt like the bad grandparents in that we provided a complete sugar overload, then left the parents to deal with those sugar-infused kids.  Haha, such fun and we didn't have to suffer the consequences!  Shawn and Michael, please forgive us!

Saturday, March 27, 2010

Matzoh Rant

We eat a lot of matzoh during the week of Passover.  A lot of it.  That's because we can't eat bread or anything made with regular flour or anything leavened (which eliminates baking powder or baking soda).  No wheat products.  Period.

I know you're probably thinking this is no big deal.

But wait - no bread?  No cereal?  (What the heck do you eat for breakfast?  You can't eat eggs every day unless you want to kill yourself).  NO BEER????

Okay, so matzoh isn't a substitute for beer.  But it stands in for cereal and matzoh meal (yuck) stands in for flour in a pinch.  And then there is the vast quantity of matzoh you have to consume at your Passover Seder, or in our case, two Passover Seders.  By the end of the week, you are sick of the stuff.

If you've never had the pleasure, matzohs are large, flat, dry (very dry) crackers.  Let me repeat that:  VERY DRY.  We eat them at our Passover Seder with harosses (a yummy mixture of apples, nuts and cheap Manischewitz sweet wine) and that killer horseradish I told you about in the last post.  It sounds bizarre, but it's actually good.  Of course, I guess that horseradish would kill the taste of anything.

And another thing.  No one agrees on how to spell it.  Matzo?  Matzoh?  Matzah?  I'm sticking to "matzoh" and I don't care if that's politically correct or not!

But here's the dirty little secret no one will tell the uninitiated.  If you eat too much matzoh, you will never have to visit the bathroom again.  Ever. 

To quote my friend Dick, that's all I'm sayin'.....

So in the spirit of matzoh overload I offer up my recipe for Matzoh Toffee.  Try it, you'll like it!

MATZOH TOFFEE

1 box matzoh (about 15 pieces)
2 cups unsalted butter
2 cups light brown sugar
1/2 teaspoon salt
1 tablespoon butter
2 cups sliced almonds
1 tablespoon kosher salt
3 12-oz. bags good quality chocolate chips, melted


Line two baking sheets (I used half sheet pans) with matzoh, cutting to fit as necessary.

In a medium saucepan, melt butter, sugar and salt over medium heat, stirring frequently.  Keep cooking until large bubbles form, then cook for 1 minute longer.  Remove from heat and pour mixture over matzoh, dividing evenly.  Let cool.

Meanwhile, melt the 1 tablespoon of butter in a skillet.  Add almonds and salt and cook over medium heat, stirring frequently until almonds are just golden.  Remove from heat and cool slightly.


Spread melted chocolate over the cooled caramel mixture on matzohs.  Sprinkle evenly with almonds and let matzoh sit for at least 30 minutes.

Break into pieces.  Try not to eat the bits that fall away.

Yield:  enough for two Seders

Note:  this will not be pretty.  Some of the matzoh will separate from the caramel layer, but who cares?  Just piece it back together and no one will know the difference.  Also, the 1 tablespoon of salt sounds like A LOT in the almonds, but it works.