Monday, November 21, 2011

Stuffed Turkey.


Nope, I am not talking about what you are likely to prepare in the next couple of days.  I refer instead to the way I have perceived myself since our gluttonous trip to Barcelona. The last thing I need right now is to consume enormous quantities of potatoes, bread, cranberry sauce, gravy and rich desserts.  Can we please just cancel Thanksgiving this year? 

Given the fact that both of my kids are coming home (yay!), this is unlikely.  Instead,  I will spend most of next week in my kitchen.  It will be a lot of work and at the end of it, I will be exhausted, but that's what we moms do and we love it, right?

Please remind me of this at the end of next weekend.

We will do the ritual thing on Thursday and turkey will make its requisite appearance.  My mom will show up, along with any other stray people I can corral, and we'll have a wonderful time and eat way too  much.  The one thing we will NOT do is go around the table and say what we are all thankful for.  I tried that one year and my kids almost threw me out of the house.  Lesson learned. 

I'm going heavy on the vegetables this year, but I will still make our usual Thanksgiving desserts.  (Please, oh please let me keep my distance from them).  There will be Hummingbird Cake, Caramel Pumpkin Pie and Cranberry Upside Down Cake.  In for a penny, in for a pound, I say.  Why make one dessert when you can make three?

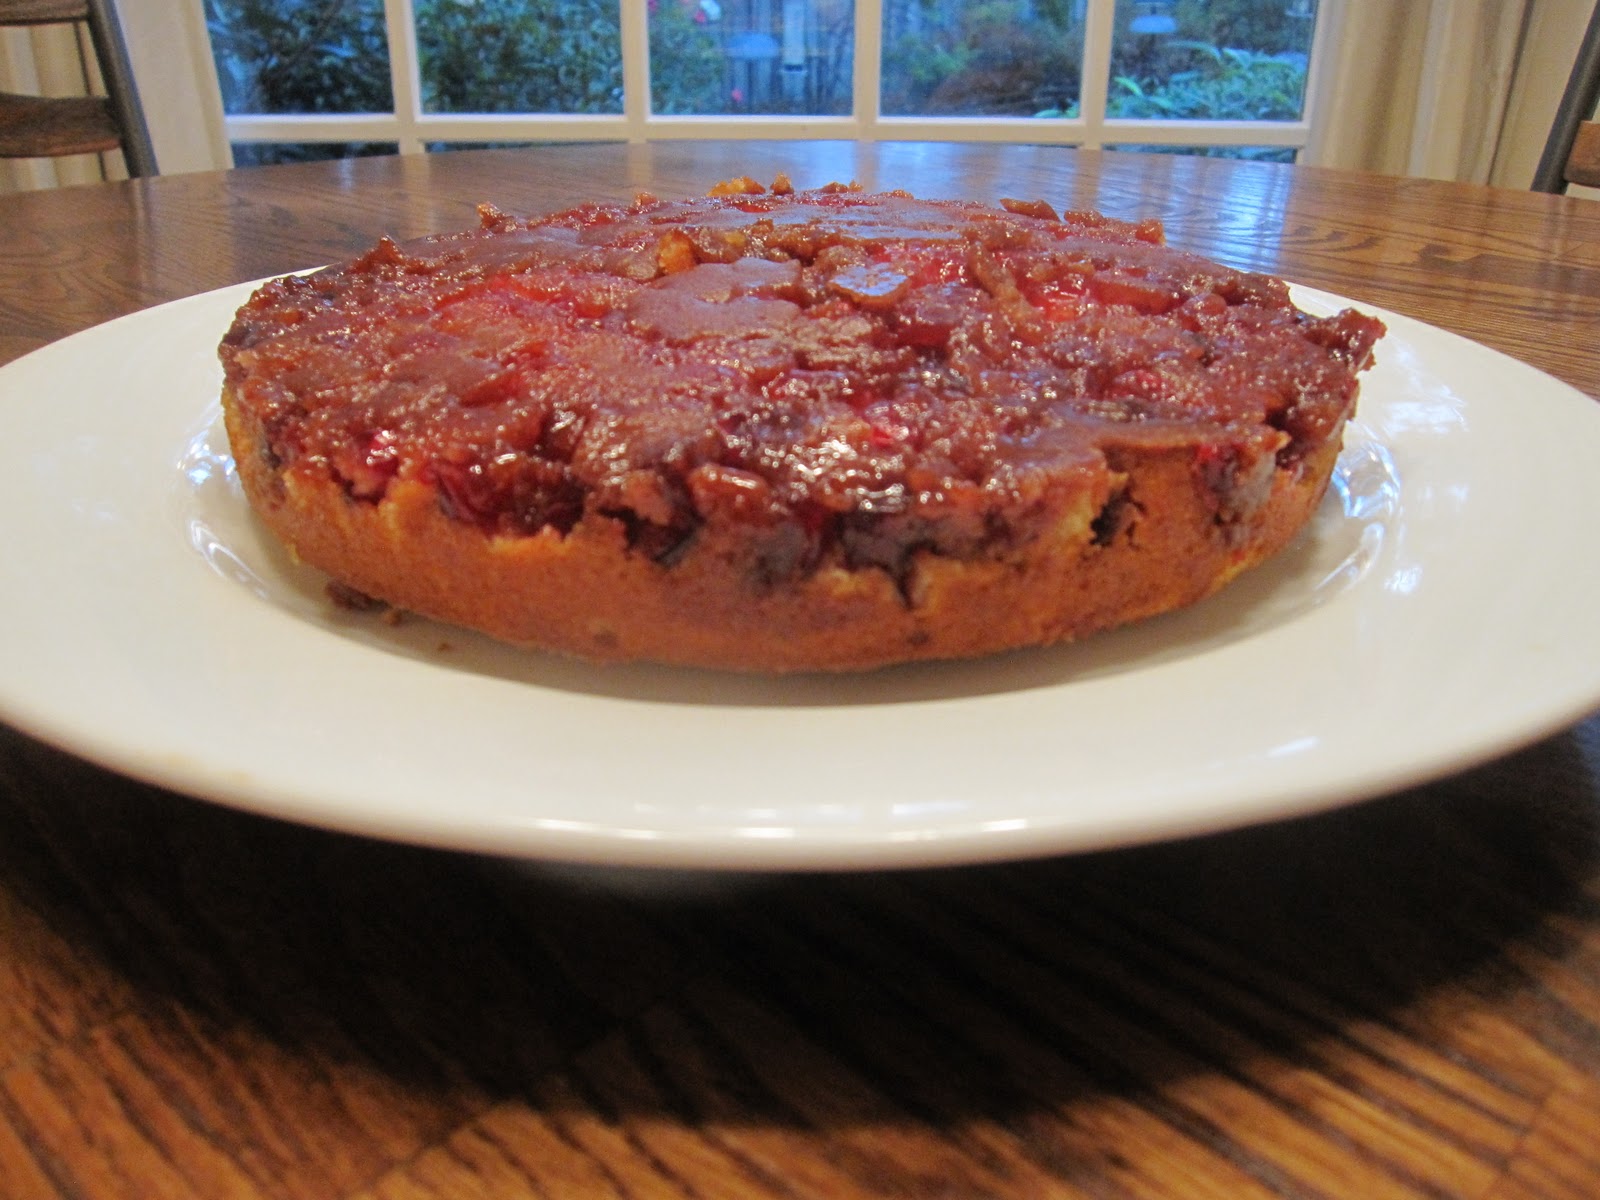
The Cranberry Upside Down Cake is my favorite.  It's sweet, tart and has that buttery/brown sugar combination that is irresistible.  I think it's better the day after it is made, which makes it a perfect Thanksgiving recipe.  I've made it for years and in fact, I used to sell it during the holidays. 

You don't need to buy it.  It's easy beyond belief to make.  Here's the recipe.  Happy Thanksgiving, y'all!


CRANBERRY UPSIDE DOWN CAKE

For the topping:
4 tablespoons unsalted butter
¾ cup packed light brown sugar
½ teaspoon cinnamon
Pinch of salt
2 cups whole, fresh cranberries

Melt butter and brown sugar in a saucepan. Stir over low heat until mixture is smooth and bubbly. Stir in cinnamon and salt. Pour into a 9-inch round baking pan which has been coated with baking spray. Arrange cranberries in a single layer over the brown sugar mixture. Set aside.

For the cake:
1 ¼ cups + 2 tablespoons sifted all-purpose flour
1 ½ teaspoons baking powder
½ teaspoon salt
¾ stick unsalted butter (6 tablespoons), softened
2/3 cup granulated sugar
1 ½ teaspoons grated orange zest
2 eggs, room temperature (I used extra-large)
1 teaspoon pure vanilla extract
½ cup whole milk, room temperature

In a small bowl, whisk together the flour, baking powder and salt until blended. Using an electric mixer, cream the butter for 1 minute. Beat in the sugar and continue to beat for 2 to 3 minutes or until mixture is light in texture. Beat in the orange zest. One at a time, add the eggs, beating well after each addition. Beat in the vanilla. Scrape down the sides of the bowl. On low speed, beat in half the flour mixture until just combined. Scrape down the sides of the bowl. Beat in the milk, then add the remaining flour and beat until just combined.

Scrape the cake batter over berries in pan. Spread batter evenly over berries. Bake for 35-40 minutes in oven preheated to 350-degrees or until a cake tester inserted into the center of the cake comes out clean. Cool the cake in the pan set on a wire rack for 5 minutes.

Run a knife around the outside edge of the cake to release it from the sides of the pan. Place a serving plate over the cake and invert cake and pan onto the plate. Carefully lift off the cake pan.

For the glaze:
¼ cup currant jelly or seedless raspberry preserves

In a small saucepan, heat jelly or preserves over medium-low heat, stirring frequently until melted and smooth. Using a pastry brush, brush the glaze evenly over the top of the cake.

Serves 8

The basic ingredients.  Except for the cranberries, you probably have everything on hand already

Butter, brown sugar and cinnamon.  I could eat this all by itself.

Don't be tempted by this, however, unless you want to burn your mouth off!

Careful not to let it spatter

If needed, use a small offset spatula to spread out in pan

Ready for the cake batter

Whisking the dry ingredients

Adding eggs to the creamed butter and sugar mixture

Batter finished.  Don't look when I lick the beater....

Spreading batter over the cranberries.  Again, an offset spatula is your best friend.

Ready to bake

Baked!

Moment of truth.  Fingers crossed.

Whew!

*  There is a certain amount of trepidation when you flip the cake pan over and hope like hell that it will slide out uneventfully on the plate.  Help yourself out by banging the top of the pan lightly with a hammer (contradiction in terms, I realize) before you lift off the pan.  If some of the caramelized sugar remains in the pan, you can spoon it over the top of the cake or just eat it yourself.  I'm just sayin'......

*  In the interest of full disclosure, I didn't glaze the cake when I made it.  Yes, it will make it look much prettier, but if you don't have currant jelly or seedless raspberry preserves on hand, just omit this step.  It will still taste just fine!

*  I also didn't have an orange on hand when I decided to test this recipe.  No worries.  I simply used a splash of orange extract in the batter and it worked just fine.  No orange extract in your house?  How about orange liqueur, such as Cointreau?

*  If you want to gild the lily, you can serve this with a little freshly whipped cream or a light dusting of powdered sugar.  Or not.

After I made this cake, I gave it away to a dear friend who is really my gay husband (no, we are not referring to Henry here).  We enjoyed a lovely lunch together, then he asked if I knew what my "porn" name was.  Huh????

Here's the deal.  Take the name of your first pet, then the name of the first street you lived on and... voila!...  you now have your "porn" name.  Holly Mercer, that's me!  Henry is Breezy Serpentine and another friend (who will remain anonymous) is Candy Baby Deliciosa. 

Since I'm not allowed to ask everyone at the Thanksgiving table what they are grateful for, perhaps we'll play this game instead......

Tuesday, November 15, 2011

Cake-O-Rama Sans the Drama


Okay, I’m recovered. Well, sort of.  I’m still not quite sure what month it is, let alone what day. I’ve been on more airplanes than I can count since mid-July and I’ve done everything from getting Eric moved into a new apartment in Philly, eating and hiking in Spain, attending three weddings, two funerals and one big birthday party, making and transporting the cakes for three of those events, to dealing with aging parents, sick dogs and rotting wood on the exterior of my house, plus hosting a couple of dinner parties.

Cripes, and is it really Thanksgiving next week???? Uh-oh. That means I need to get my act together and give you the recipe for my cranberry upside down cake in the next few days. It’s my favorite Thanksgiving dessert so I will make it a priority to pass it along in case you want to try it out for your holiday dinner.

For now though, we’re going to talk about coconut cake. When Andy’s best friend Anna asked me to make her wedding cake, it was a short conversation. We’ve known Anna since she and Andy were in the 4th grade and she’s part of our family. So what if her wedding was taking place in NYC? So what if I couldn’t do any advance prep since there was no way to get it there via the friendly skies? So what if I had to create the thing in Andy’s kitchen, which is about the size of my car? Minor details.

Here's the extra suitcase I had to drag with me to NYC

Here's what was in it

And here is Andy's one-ass kitchen!

But first, I had to come up with the perfect recipe. While I believe that a wedding cake should be beautiful, it’s even more important that it is moist and utterly delicious. Since the layers have to be made several days in advance, this is not an easy task. I tested several recipes which didn’t make the cut. Then I turned to biochemist and problem-solver extraordinaire, Shirley Corriher. Another short conversation.

If you ever have the opportunity to meet Shirley, you will fall in love with her immediately. She is ebullient, gregarious and flat-out hilarious. She is also smart like nobody’s business and has applied her vast knowledge to every food application known to man. She has been a trusted resource for everyone from Julia Child to Alton Brown.  Her two books, Cookwise and Bakewise are volumes which no serious cook should be without. Next to Scott Peacock and Edna Lewis’ The Gift of Southern Cooking, hers are the books which receive the most use in my kitchen.

Her take on coconut cake is pure genius. Rather than incorporating coconut in the batter, she makes lovely golden cake layers and soaks them with a mixture of milk, sugar and coconut. She also eschews the usual creaming of butter and sugar for a dissolved sugar method, resulting in a velvety-soft texture. This cake came together easily, which was a good thing since I had to make the recipe times eight. Thanks, Shirley!


Dinner-on-the-Grounds Coconut Cake  (adapted from Shirley Corriher)

For the cake:
1 ¾ cups cake flour
1 ¾ teaspoons baking powder
1 ½ cups granulated sugar
1/3 cup water
4 tablespoons unsalted butter, room temperature and cut into fourths
2 teaspoons pure vanilla extract
1 teaspoon pure almond extract
½ teaspoon salt (I used sea salt)
1/3 cup canola oil
3 egg yolks (I used extra-large)
2 eggs (I used extra-large)
½ cup heavy cream

Arrange a shelf in the lower third of the oven, place a baking stone on it and preheat the oven to 350-degrees.

Spray a 9 x 2-inch round cake pan with nonstick cooking spray. Line bottom and sides of pan with parchment paper and spray again. Set aside.

Place flour and baking powder in the bowl of an electric mixer fitted with the paddle attachment. Beat on medium speed for 30 seconds. Remove to a large bowl and set aside. Add sugar to the mixing bowl and place it back on the mixer stand.

Heat the water to a simmer and add it to the sugar. Beat a few seconds to dissolve the sugar, then beat in the butter, vanilla extract, almond extract and salt. Add the oil and mix on medium to blend.

Sprinkle one-third of the flour mixture over the sugar mixture. Blend on low speed with a minimum amount of beating. Continue adding the flour until all is incorporated.

By hand, stir in the egg yolks, one at a time, then the whole eggs, one at a time.

In a separate bowl, whip the heavy cream until soft peaks form. Whip just a little more, just past the soft peak stage. Stir about ¼ of the whipped cream into the batter to lighten. Then gently fold the rest of the whipped cream into the batter by hand.

Pour the batter into the prepared pan. Drop the pan on the counter from a height of about 4-inches to knock out any air bubbles. Place in the preheated oven on the baking stone and bake until the center springs back when touched or a toothpick inserted into the center comes out clean but moist, about 40 minutes. Place on a rack to cool for about 10 minutes, then shake pan to loosen the cake. Turn onto a baking rack to finish cooling completely.

Yield: 1 9-inch round layer (which can be sliced into 2 layers)

For the coconut soaking solution:
1 cup whole milk
1 cup granulated sugar
6 oz. grated coconut

In a medium saucepan, combine all ingredients.  Bring to a boil over medium heat, then let cool slightly.  Can be used hot or warm.

For the frosting:
I tested a lovely recipe for cream cheese buttercream, but it was a lot of work and I don't think the end result was worth it.  At the end of the day, I used my standard cream cheese frosting, enhanced by a splash of pure almond extract.  It was delicious and no one missed the fact that it wasn't a true buttercream.  Here's the link to my frosting recipe.  Just remember to add 2 teaspoons of almond extract.

http://nevertrustaskinnycook1.blogspot.com/2009/10/humingbird-cake.html

To assemble:
6 oz. shaved coconut

Place one cake layer, cut side up, on a serving platter.  Spoon the soaking solution over, in small spoonfuls and let it absorb into the cake.  Use enough to ensure that cake is moist but not falling apart.  Spoon some of the frosting over the soaked layer and spread out evenly over the coconut, leaving a small border around edges.  Place the second layer on top, cut side up and repeat the process, bringing frosting down the sides to create a very thin crumb coat.  Refrigerate for 30 minutes until set, then frost completely. Press shaved coconut onto sides and top of cake.  Store at room temperature.

Serves 8 - 12

First batched baked.  Check!
(Note Magi-Cake strips on pans)

Baking core in place. 
 Think we could use a little more counter space?

Baking core did its job

All baked.  Whew!

Here's the coconut soaking solution

Frosting ingredients.  Think there will be enough?

Frosting done and I didn't even eat all of it!
Don't you just want to stick your finger in there?

Leveling the layers

Now for the fun part!

Crumb coat completed

Ready for transport -- to Brooklyn.
Oy veh!

*  Shirley says that the use of cake flour is essential to this recipe.  I would never be one to argue with her, so do as I did and follow her instructions.  Yet another short conversation.

*  I also did as I was told and baked my layers on top of a baking stone (in my case, it was a pizza stone).  It did help to ensure nice, even layers so if you have one, by all means use it.  If not, I would not race out to buy one, unless you are in the mood to make your own pizza. 

*  The recipe as written yields one cake layer which can be split into 2 layers.  Alternatively, you could divide the batter between 2 pans and bake two thin layers.  Or, you could double the recipe and divide between two pans, resulting in a higher finished cake.

*  Here's a professional tip:  use Magi-Cake strips when you bake your cake layers.  These are long strips which you soak in water, then wrap around your cake pans.  They help the cake edges bake more slowly than the middle of the cake, resulting in even layers without domed centers.


*  One more tip:  use a baking core if you are baking layers 10-inches in diameter or more.  These are metal "cups" which you spray with cooking spray and insert directly into the batter in the middle of the pan, then fill with cake batter.  When the cake is done, you remove the core (which leaves a hole in the middle of the cake), let it cool, then remove the cake inside and use it to "plug" the hole in the cake layer.  These help the middle of the cake bake more quickly and also help to ensure that layers bake evenly.

AND NOW THE BACK STORY...

Anna and Jourdan held their ceremony on the roof garden of their high-rise building in DUMBO at 11:00am on a gorgeous autumn Saturday morning.  We were treated to a fabulous view of Manhattan, then we walked en masse (all 75 of us) to the ferry where we boarded for a short but beautiful trip to Greenpoint, disembarked and walked a short distance to Paulie Gee's, which bills itself as a neighborhood pizza joint.  We loved the place and it was the perfect spot for Anna and Jourdan's celebration.  Oh, and the pizza was pretty good, too!

(Here is a 5-minute video of that wonderful day.  It makes me cry.  Stick with it after the toasts (that's best man Andy doing the first one) and you'll get a good view of the cake.  Brief cameos of Henry and Eric, too).


There was only one problem.  Since Paulie Gee's is in a very small space, they did not have room for me to deliver and set up the cake on Friday and there was no way I could get it there on Saturday morning then make it to the wedding on time.  In stepped Pola, of Tashi and Bobo, the lovely lady whom Anna and Jourdan chose to do the flowers.  Andy and I managed to deliver the finished layers to her on Friday, then she transported, stacked and adorned them with flowers at the restaurant on Saturday morning.  Thank you, Pola!  BTW, if any of you are in need of an incredible florist/designer, check out her website.  Ha, and she makes wedding cakes, too!


Lest you think my work was done, think again.  That evening, there was a big football game on the tube (don't even ask me what it was; remember I am not a football person) and Andy decided that everyone should watch the game at his apartment.  Of course that translated into "can you make something for us to eat, Mom?"  So "Mom" headed back to the city in the late afternoon, hit the grocery store and whipped up a huge pot of chicken chili.  They devoured every bit of it.  Go, Liz Mom.

We returned to Atlanta on Monday and I hit the ground running on Tuesday.  Why?  That's because I was making another cake - this time for a dear friend's birthday.  Somehow I managed to pull it off - at least I didn't have to pack a suitcase this time!

Rich and Moist Bittersweet Chocolate Cake with Salted Caramel,
 Milk Chocolate Buttercream and Bittersweet Chocolate Tiles


Friday, October 28, 2011

Back to Reality


With a jolt. What I didn’t mention here was that my father-in-law’s wife passed away the week before we left for Spain, necessitating a quick trip to NYC before our departure. We returned to find Henry’s father in the hospital; sadly he passed away last week, so we headed to NYC yet once again. While we are saddened by these losses, we take comfort in the fact that they both had very long and satisfying lives.

Now you know why the hiatus lasted longer than two weeks. I’ll try to get back on track…

The athletes.  Yeah, right.

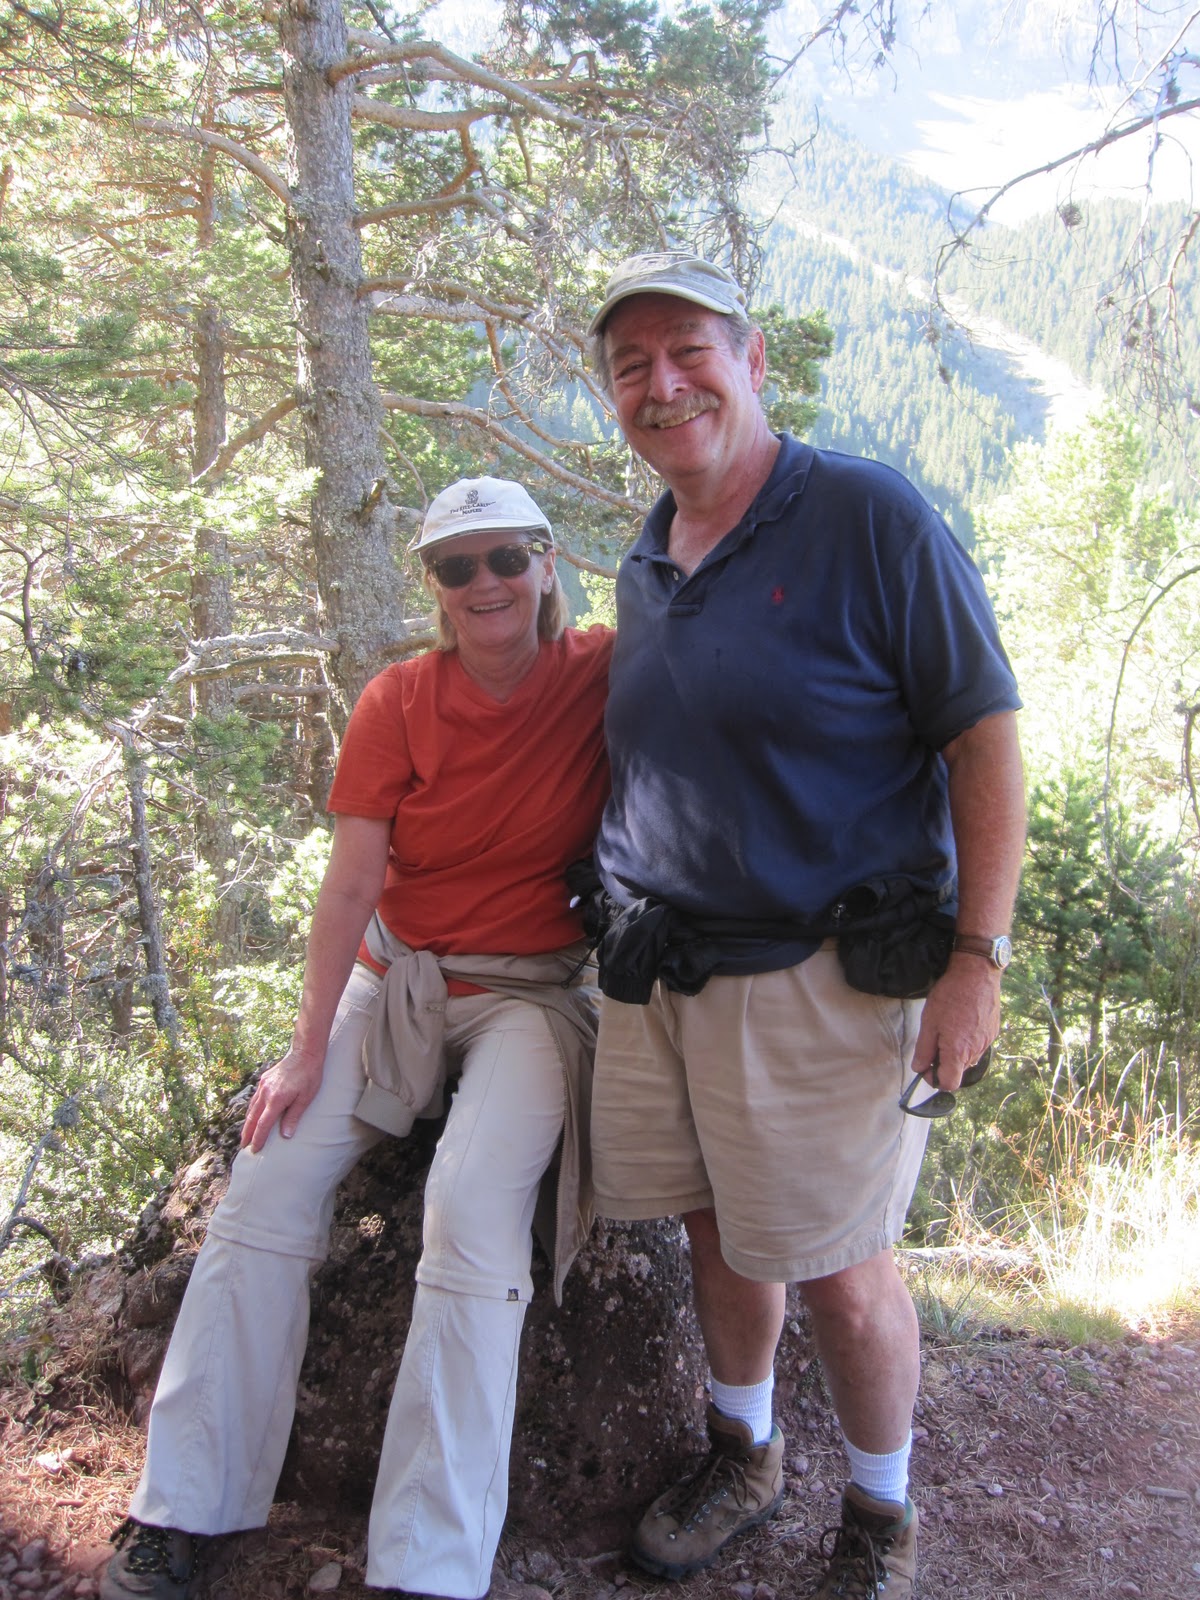
As you know, we went to Spain to celebrate our 30th wedding anniversary. (I’ve no idea how we’ve made it this long without killing each other but somehow we continue to have a wonderful marriage and we still actually like each other). The first week was spent hiking in La Costa Brava and the Pyrenees (can you say “unrelenting rocks and elevations?”) and the second was in Barcelona where we undid the benefits of all that exercise by eating way too much foie gras. Needless to say, we had a glorious time. See for yourself.

We hiked here

And here!

Gaudi.  Genius.

La Sagrada Familia.  Still unfinished.

And the food.  Oh, the food!  Foie gras, razor clams, Jamon Iberico, gazpacho, paella and lots and lots of Cava!


The color of the figs was unreal.  Local cheese didn't hurt, either.

Local honey tasting in the Pyrenees

Goat Cheese "Mata" thickened with artichoke flower

Straight from the chef's garden

Tomato bread and Jamon Iberico

Breaking the fast (I'm not kidding) with foie gras and egg
at Bar Quim in La Boqueria

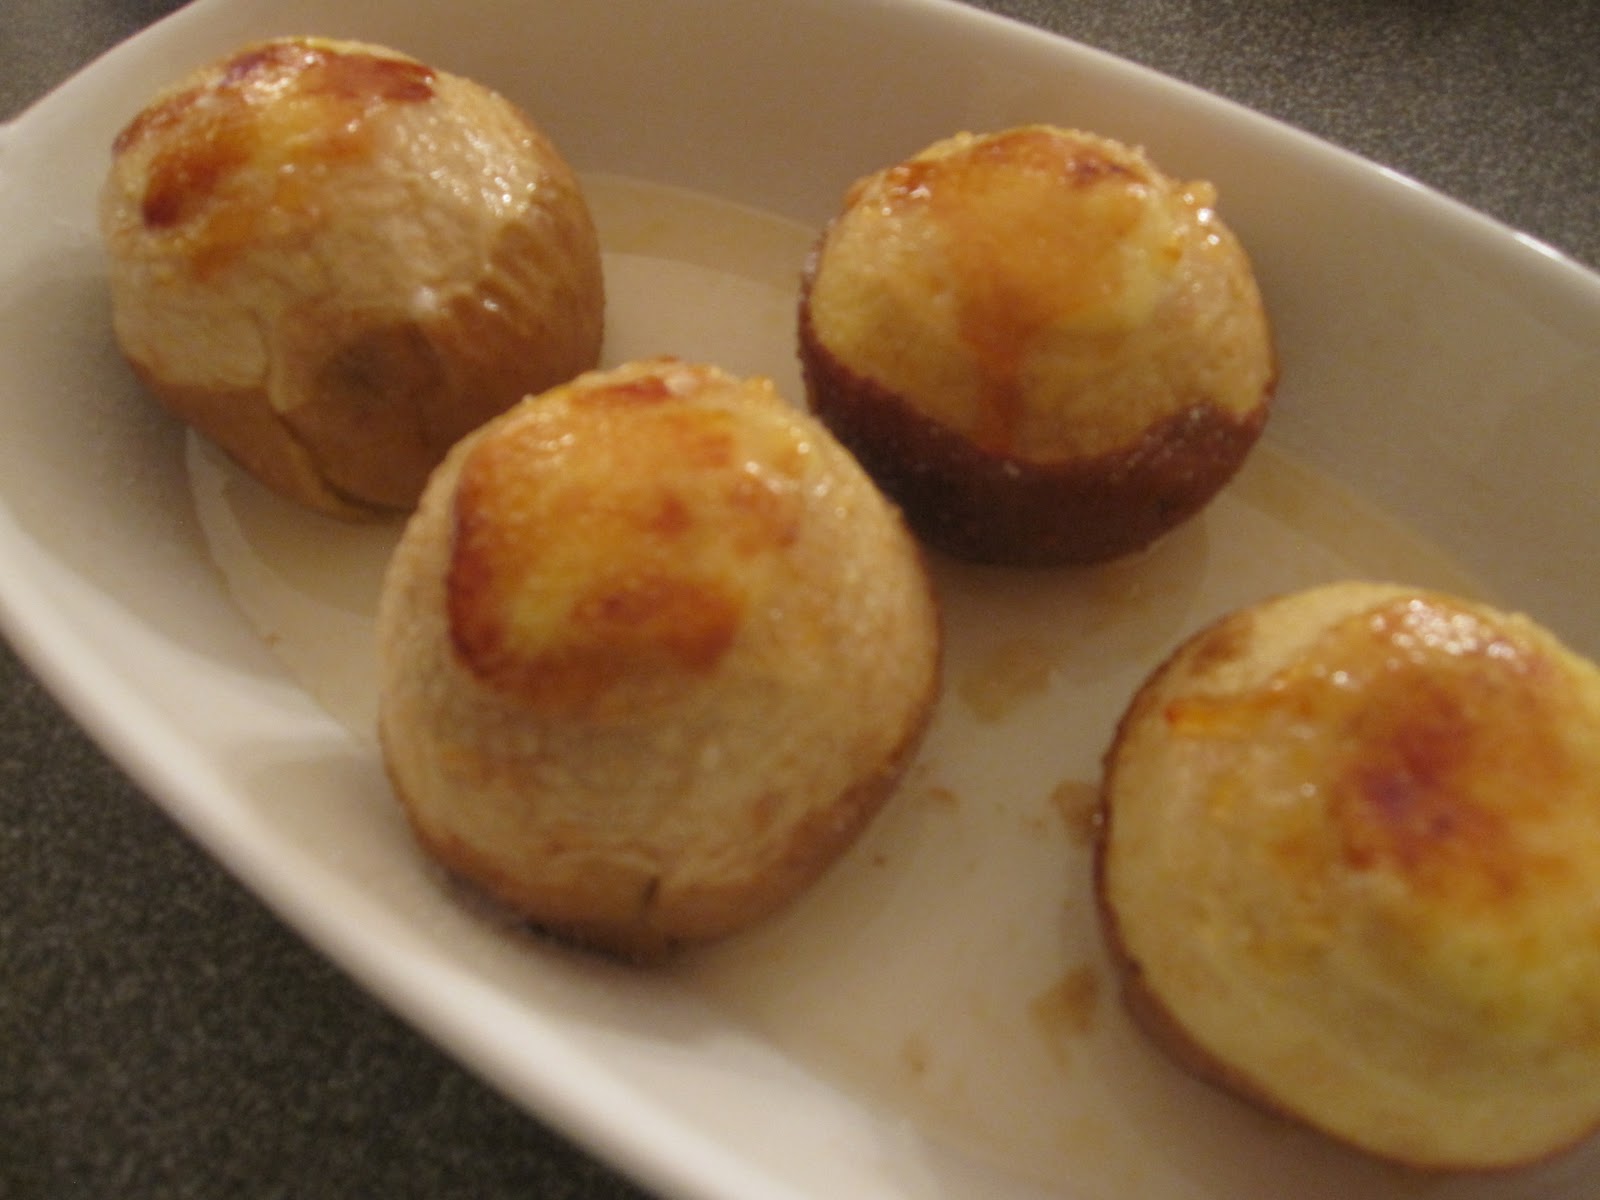
Naturally I returned home full of resolve to hone my Catalan cooking skills. I unearthed my old copy of Colman Andrews’ Catalan Cuisine and set to work. About that time, a friend showed up with a stash of locally grown apples. It looked to me like Pomes Farcides amb Crema Catalana (Apples Stuffed with Catalan “Burnt Cream”) was in order.


I made the recipe. Since I now have to work even harder at becoming a skinny cook, I made it as written (serving 4), but gave half of it away when our 12-year-old next-door neighbor unexpectedly showed up. This kid is wise beyond his years and he has a pretty sophisticated palate to boot. He’s picky, too. I wondered what he would think of this not-too-sweet dessert.

I didn’t have to wait long. Ten minutes after he left with the apples, he was back. He was beaming, but chose his words carefully – “the custard was runny, so it made a good sauce. The baked apple was juicy and sweet, but also crunchy. It was perfect.”

Alrighty, then. I take that as high praise. Apples are in season now, so it’s a good time to make this.  Hope you enjoy it as much as Gabriel did!


Pomes Farcides amb Crema Catalana  (Apples Stuffed with Catalan "Burnt Cream") from Colman Andrews

4 large baking apples
1/2 cup granulated sugar, divided
Crema Catalana (recipe follows)

Preheat oven to 350-degrees.

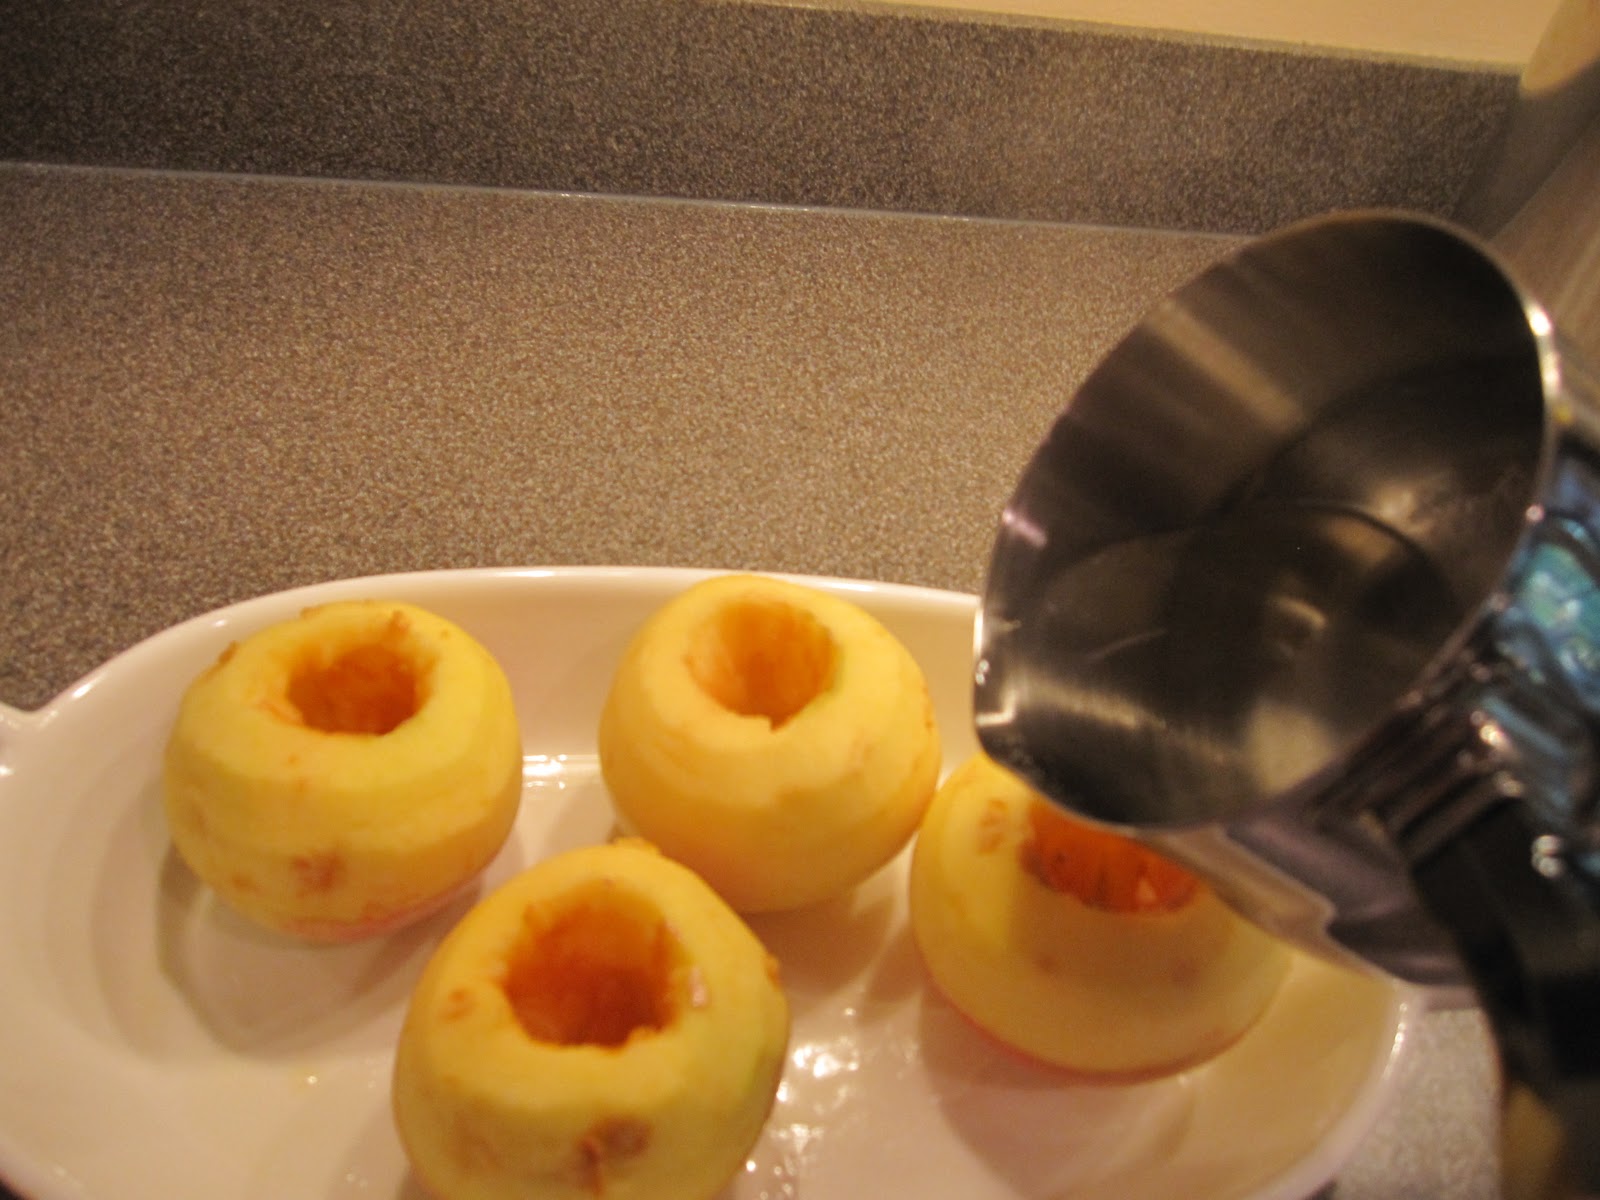
Core the apples, being careful not to cut through the bottoms, then pare a 1-inch strip around the top of each.  Place apples in a lightly buttered baking dish just large enough to hold them.

Bring 1/2 cup of water to a boil and add 1/4 cup of the granulated sugar.  Stir to dissolve, then spoon liquid over the apples.

Bake uncovered, for 30 - 40 minutes or until apples are tender, basting occasionally..  Remove from oven and allow to cool for about 10 minutes, continuing to baste occasionally.

Fill each apple with the Crema Catalana, then sprinkle the tops with the remaining sugar.  Use a blow torch (or broiler) to caramelize.  Cool slightly before serving.

Yield:  4 servings

For the Crema Catalana:
2 cups (1 pint) half-and-half
Peel of 1/2 lemon
1 small cinnamon stick (3-inches)
3 egg yolks
1/4 cup sugar

Heat the half-and-half, lemon peel and cinnamon stick in a saucepan over medium heat until just boiling, then remove from heat immediately.  Allow to cool, then discard lemon peel and cinnamon stick.

Beat the egg yoks and sugar until thick.  Temper with 1/4 cup of the half-and-half mixture, then blend in the rest.  Transfer mixture to a heave-bottomed saucepan.

Place over medium-low heat and cook, stirring constantly, until mixture thickens and coats the back of a spoon.  This will take approximately 20 minutes.  When thickened, remove to a bowl and cool slightly.  Press plastic wrap directly over the surface to prevent a skin from forming and refrigerate until ready to use.

Yield:  approximately 2 1/2 cups


Yet again, I have a few comments.  So, what else is new?

*  This recipe makes more Crema than you need.  You could cut it in half (1 1/2 egg yolks, anyone?) or you could just make the recipe as written and enjoy the spoils.  A spoonful here, a spoonful there - when consumed in such small amounts, calories don't count, right?

*  If you are looking for an active vacation, look no further than Backroads.  This is the second trip we have taken with them and they are just flat-out stellar.  I fell in love with our guides, Vincent and Chema.


*  Do you need a travel agent?  If so, I have "the travel agent extraordinaire."  Send me a message if you want her info and I will happily share it with you.  Doreen, you rock!

*  Two major cakes are in my immediate future.  One is a wedding cake and one is a BIG birthday cake.  Oy veh!  Once I recover, I will give you all of the dirty details.

Thursday, October 13, 2011

Four Words

No mas jamon Iberico! For that matter, no more foie gras either. I have OD'd on both since I've been in Spain. A recent dinner entree was a hunk of foie gras the size of a small filet mignon. It's served here with just about anything you can think of ... fried eggs, risotto, steak, salad and probably even cardboard. Oh, my arteries!

Headed home tomorrow and not a moment too soon. If I was something less than a skinny cook before, I am even less so now. (Can you say "porker?")

Nonetheless, I am returning with some great ideas and lots of inspiration. See you in a few days after I get over my jet lag and utter exhaustion from a week of vigorous mountain hiking.

Hasta luega! Headed out for one last dinner...