Monday, November 8, 2010

My Latest Obsession

You know what that means.  Ingredient overload.  Fortunately for you guys, I used up all of those hazelnuts (sorry, Henry), so you don’t have to hear about them again for awhile. Unless, of course, you want my recipe for mushroom, artichoke and hazelnut salad.

For now though, I’m focused on preserved lemons.

Have you ever had preserved lemon? Not out of hand (who would do that anyway), but in a dish such as a Moroccan tagine? It adds a big “wow” factor and a lovely depth of flavor. The best way I can describe it is intense lemon flavor multiplied by the power of ten.

I recently made them to use in a chicken and olive tagine, which is a pretty classic combination. The dish was delicious, but I ended up with more preserved lemons that I knew what to do with. Now what?

What” turned out to be using them in a roasted zucchini dish. I made a big batch of the stuff the other night and served it with grilled bison burgers (c’mon, it was a weeknight and I was slopping the hogs). The good news is that I had enough left over to eat for breakfast the next two days. (I know, I have weird breakfast preferences, but we’ve already discussed that, so let’s not go there again!)

The next “What” was stirring them into couscous, along with some scallions, toasted pine nuts and chopped Italian parsley. I served this with cedar-planked King salmon and ka-ching! Another winner.

Oh, but I’m not done. I haven’t told you about the shrimp and rice yet, possibly the most delicious dish of all.

See, I told you I was obsessed!  "What?"


PRESERVED LEMONS  (from Gail Arnold and Ina Garten)

3 lemons
2 tablespoons kosher salt

Preheat oven to 250-degrees.


Wash lemons and cut in half lengthwise then cut each half lengthwise into thirds.  Place in one layer in a large baking dish (I used a 13 x 9 x 2-inch Pyrex) and sprinkle with the salt.  Add enough water to cover and bake for 3 hours.
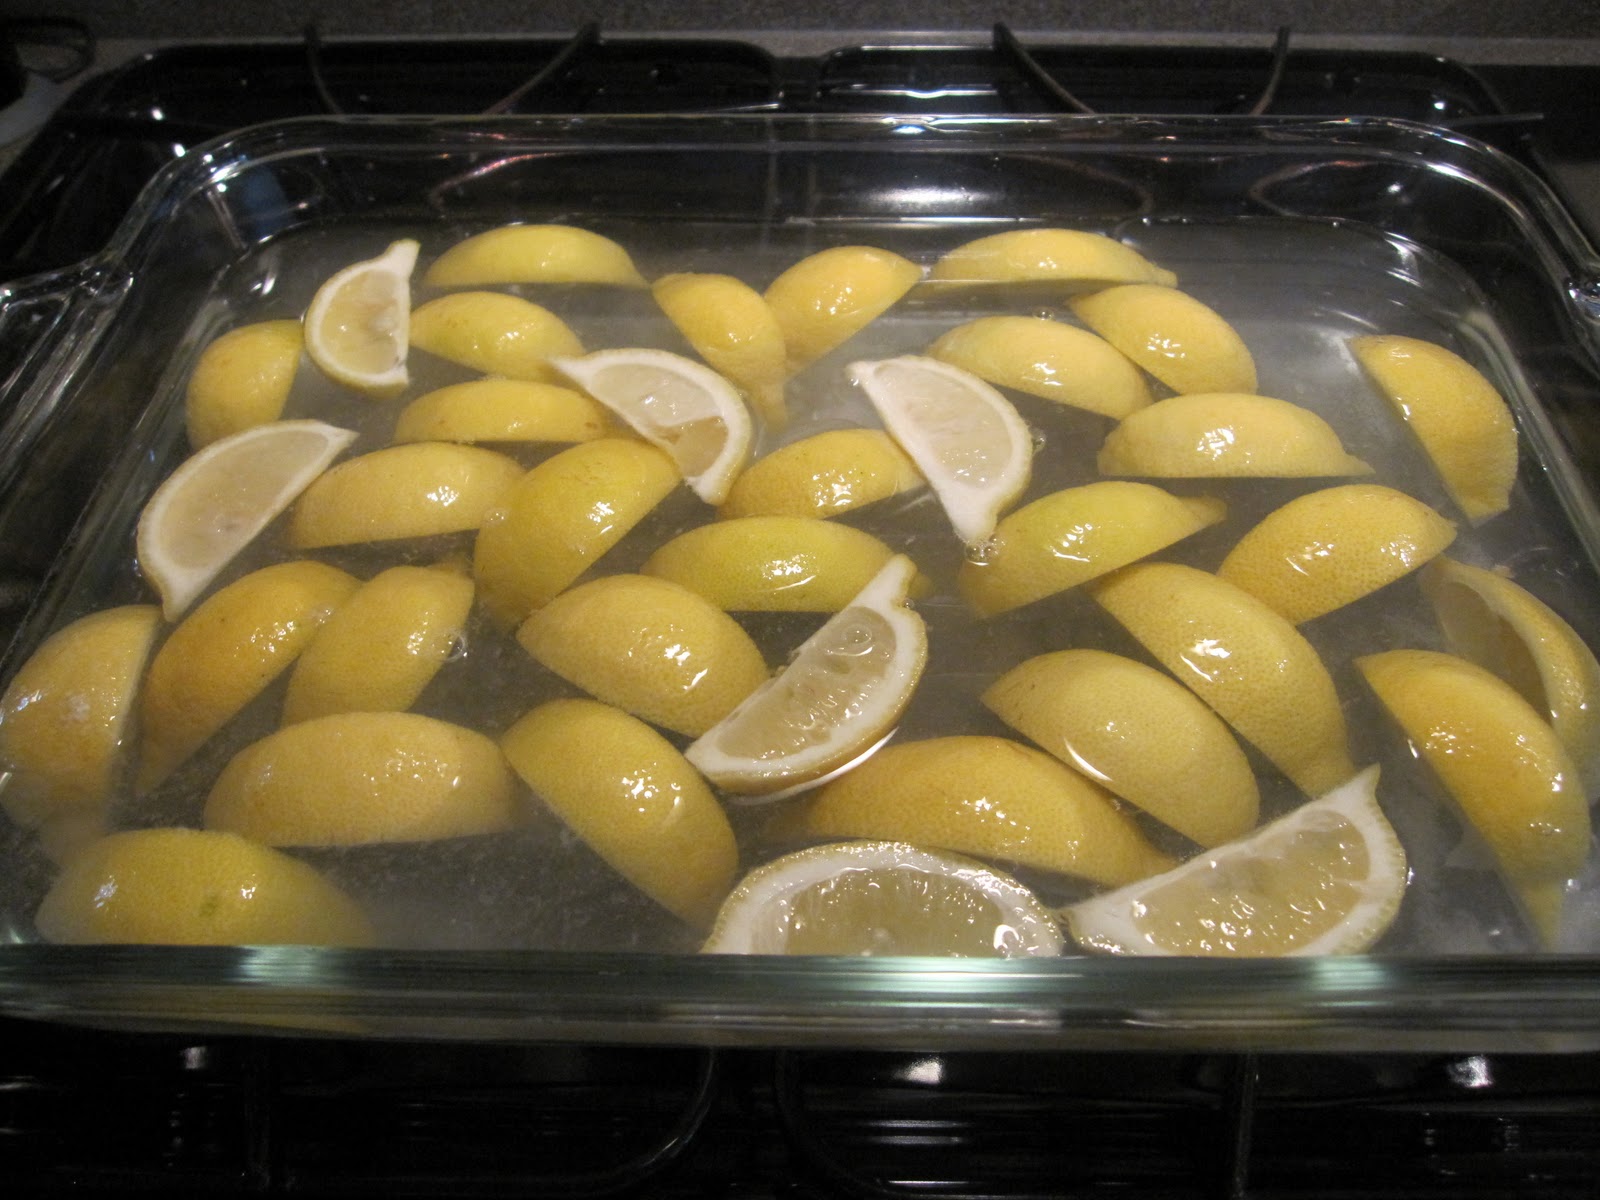

Remove from oven and allow to cool.  Place lemons in a wide-mouth quart glass canning jar and pour in enough of the liquid to cover.  Screw lid on top and refrigerate.

These can be stored in the refrigerator for up to 6 months.


Yield:  18 wedges


ROASTED ZUCCHINI WITH PRESERVED LEMON AND OREGANO (adapted from Beau MacMillan)

4 to 5 medium zucchini
2 tablespoons extra-virgin olive oil
Juice and zest of 1 lemon
2 cloves garlic, minced
1 shallot, minced
2 tablespoons chopped Italian parsley
2 tablespoons chopped fresh oregano
Kosher salt and freshly ground black pepper to taste
½ cup pitted and chopped Kalamata olives
1 wedge preserved lemon, rinsed and chopped (including rind)

Preheat oven to 375-degrees. Place a roasting pan in oven to preheat.

Slice zucchini in half lengthwise then cut across into thirds. Place in a bowl and toss with the olive oil, lemon juice and zest, garlic, shallots, parsley and oregano. Season well with salt and pepper.

Remove the hot roasting pan from the oven and add the zucchini mixture, spreading it out in one layer. Return to oven and roast for 5 minutes. Stir in the Kalamata olives and roast for an additional 4 to 5 minutes or zucchini is just tender. Serve immediately.

Yield: 4 – 6 servings


PINE NUT AND PRESERVED LEMON COUSCOUS  (adapted from Emeril Lagasse)


2 cups couscous
2 cups chicken or vegetable stock
2 tablespoons butter or olive oil
1 cup chopped scallions
Kosher salt and freshly ground black pepper to taste
1 cup pine nuts, toasted
1 wedge preserved lemon, rinsed and chopped (including rind)
2 tablespoons chopped Italian parsley

Place couscous in a wide bowl or shallow pan. Bring stock to a simmer and pour over the couscous. Cover and let sit until liquid is absorbed, about 5 minutes.

Meanwhile, melt butter (or heat oil) in a small sauté pan over medium heat. Add scallions and season with salt and pepper. Sauté for 1 minute, then add to couscous along with pine nuts, preserved lemon and chopped parsley. Use a fork to fluff well and blend all ingredients. Taste to adjust seasonings.

Yield: 4 – 6 servings


SHRIMP AND RICE PILAF WITH SAFFRON AND PRESERVED LEMON (adapted from the Food Network)

3 tablespoons olive oil, divided
1 medium onion, chopped
3 cloves garlic, minced
1 teaspoon saffron threads
Kosher salt and freshly ground black pepper to taste
1 cup brown rice
2 ½ cups chicken or vegetable stock
1 15-oz. can diced tomatoes
½ teaspoon cayenne pepper (or more to taste)
½ cup chopped and pitted green olives
1 pound medium shrimp, peeled and deveined
1 wedge preserved lemon, rinsed and chopped (including rind)
Chopped Italian parsley, for garnish

Heat 2 tablespoons of the olive oil in a medium saucepan over medium-high heat. Add the onion and cook for 3 minutes or until soft. Add garlic and saffron threads and cook for 1 minute more. Season with salt and pepper, then add rice and sauté, stirring constantly for 2 minutes. Add the stock, cover the pot and lower heat to simmer. Cook for about 45 minutes, or until rice is tender.


Meanwhile, heat remaining olive oil in a sauté pan. Add tomatoes and cayenne pepper and cook for 5 minutes until liquid reduces slightly. Add the olives, shrimp and preserved lemon. Cook over medium heat until shrimp turns pink and starts to curl slightly, 3 to 5 minutes. Do not overcook. Season with salt and pepper.

Add rice mixture to shrimp in sauté pan and stir to blend. Taste to adjust seasonings. Turn into serving bowls and garnish with the chopped parsley.

Yield: 6 – 8 servings

• You can make this with white rice, if desired (although I like brown rice better for its texture and healthier qualities). If using white rice, decrease cooking time to 20-25 minutes.
• This recipe is somewhat “paella-like.” To make it more so, you could add chunks of cooked sausage and/or chicken.
• And yes, saffron is expensive. If you can’t bring yourself to buy it, you can substitute  turmeric (poor man's saffron). A little smoked paprika or pimenton would be good in this dish also.

Whew!  I'm done now.  Enough recipes for now?

Tuesday, November 2, 2010

Cakewreck


Remember the post I wrote about those adorable little girls who live on our street?  For the past couple of years I have donated the promise of a chocolate layer cake at an annual auction to benefit their school. 

http://nevertrustaskinnycook1.blogspot.com/2010/08/flash-in-pan-cupcakes.html

This is no ordinary chocolate layer cake.  It's the one I used to bake at Watershed and as far as I know, it's still on the menu as I write this.  It's the brainchild of the legendary Scott Peacock and it surpasses any chocolate cake you will ever encounter.  It's worth every calorie and every gram of fat.  And this comes from me, the salt addict!

This year's auction winner called me recently to claim her cake.  As it turned out, we were invited to dinner with friends around the same time and as usual, I had volunteered to supply dessert.  "Great," I said to myself, "I'll make two cakes and kill two birds with one stone."

Oy veh, I sound like Henry with his cliches, don't I? 

 I proceeded to make two chocolate layer cakes.   At the end of the day, this proved to be a brilliant move.

That's because one of the layers split as I transferred it to the turntable to frost it.  "Hmmm," I thought, "I'll just glue it together with frosting and no one will know the difference."

So, I did.  It looked pretty good, in spite of the fault line lurking below.  The layers for the second cake (fortunately) stayed in their place and I assembled and frosted them also.  I now had two stunningly gorgeous chocolate layer cakes.

For about two hours.

And then my "earthquake cake" suddenly looked like this:


Enter good friends. I toted this (embarassing) wreck to the dinner party and we all had a great laugh.  We pretty much wiped it out too, despite its appearance.  My friend Jon couldn't resist taking pictures of the damn thing, but I'm glad he did, so I could share it here.

Here is the recipe.  It's not complicated, but it is.  The frosting is temperamental and so is the cake.  Reap the benefits of my experience with both.


VERY GOOD CHOCOLATE CAKE      (From "The Gift of Southern Cooking" by Scott Peacock and Edna Lewis)

For the cake:
2 cups granulated sugar
1 ½ cups cake flour
½ teaspoon salt
¾ teaspoon baking soda
1 cup hot double-strength brewed coffee
4 oz. unsweetened chocolate, chopped
2 eggs at room temperature
½ cup vegetable oil
½ cup sour cream at room temperature
1 ½ teaspoons pure vanilla extract

Preheat oven to 325-degrees. Sift together the sugar, flour, salt and baking soda into a large bowl. Set aside.

In a small bowl, pour the hot coffee over the chocolate and allow chocolate to melt completely, stirring occasionally.

In a medium bowl, whisk together the eggs and vegetable oil until well blended, then whisk in the sour cream, vanilla and chocolate mixture. When blended together, stir this mixture into the dry ingredients by thirds, stirring well after each addition until completely blended.


Divide the batter evenly between 2 buttered and floured 9-inch round cake pans which have been lined with parchment paper. Drop each cake pan once onto the counter from a height of 3-inches to remove any large air pockets. Bake in the preheated oven for 30-40 minutes until the cake springs back slightly in center and a cake tester comes out clean. Remove to cooling racks and let cool 5 minutes. Run a flat-edged knife or spatula between the cake layers and the sides of the pans. Turn pans face down onto the cooling rack and carefully lift them off. Allow the cakes to cool completely before peeling off the parchment and before frosting.


 For the frosting:
1 cup heavy cream
8 tablespoons (1 stick) unsalted butter, cut into ½-inch pieces
½ cup granulated sugar
¼ teaspoon salt
1 pound semisweet chocolate, finely chopped
¼ cup hot double-strength brewed coffee
1 teaspoon vanilla extract

Heat the cream, butter, sugar and salt in a heavy saucepan over medium-high heat until butter is melted. Add the chocolate and cook over very low heat, stirring constantly, just until the chocolate is melted and the mixture is smooth. Make sure chocolate is completely melted – this may take a few minutes. Remove from heat and add coffee and vanilla.


Transfer the mixture to a large bowl or shallow pan and let cool, stirring occasionally, until it reaches spreading consistency. This can take anywhere from 1 to 3 hours, depending upon the temperature in your house. Do not refrigerate or chill over ice water. Chocolate and butter solidify at different temperatures so chilling could cause the frosting to separate and turn grainy.


To assemble the cake:
When frosting is of a spreading consistency and cake layers are completely cooled, put a small amount of frosting on a serving platter (to help stabilize cake) then place one cake layer on top, bottom (flat) side up. Frost the surface thickly the top with other layer, bottom (flat) side down. Frost top and sides of cake. Allow cake to sit in a cool place (not a hot kitchen) for at least 2 hours before slicing.

Store cake covered, at room temperature.

Yield: 12 – 16 servings

Now, here’s what I have to say about this cake:

• These cake layers are extremely moist, making them a little difficult to work with (as the picture above shows). Before transferring to a cake plate to frost, make sure they are completely cool. Also, use utmost care when moving them to the plate as they will want to come apart on you.

• Although the recipe calls for 9-inch cake pans, I find that I have better success using 8-inch pans. This results in slightly thicker layers, making them easier to handle and producing a cake which is higher (which I prefer). If using 8-inch pans, you may need to add 5 minutes or more to the baking time.

• The frosting recipe as written is perfectly adequate, but I have an irrational fear of not having enough so I usually increase it by half. If you’re not crazy like I am, then you can use the quantities as written but if you do, you will not have any left over for the baker!

• Do yourself a favor and taste the frosting both before and after adding the coffee and vanilla. The difference is subtle, but stunning.

So there you have it. I hope you won’t be afraid to try this recipe, because it is possibly the most delicious chocolate layer cake on the face of this earth. Even if it does end up as an “Earthquake Cake!”

Monday, November 1, 2010

A Few More Hazelnuts


Are you sick of hazelnuts yet?  Sorry but I'm not, so you will just have to put up with me for another recipe or two.  I would apologize, but I think instead you should thank me for the recipe I'm about to post.  Yes, it's that good!

As I mentioned a couple posts ago, I have propelled myself into hazelnut overload these last few days.  I've scoured my cookbooks and the internet for interesting recipes.  And boy, did I find one.  That would be the recipe in "Gourmet Today" for hazelnut and olive ruggelach.

What????????  Isn't ruggelach a cookie-type thing?

Well, yes.  In fact, I posted my mother-in-law's recipe for it last spring:

http://nevertrustaskinnycook1.blogspot.com/2010/05/family-treasures.html

That's why this recipe intrigued me.  I mean, who ever heard of a savory ruggelach?  Then again, bread pudding is most often thought of as dessert, but I make a mean savory version of that as well.  Alrighty then, let's take a stab at this recipe.

When I first read it, I wondered if it would have enough taste.  I even thought about brushing the pastry with a little dijon mustard.  I didn't.  I also thought about adding a little more salt (c'mon, you know how addicted I am to the stuff).  I didn't.  Instead I made the recipe as written (not something I do often) and it was delicious.  No tweaking necessary!


HAZELNUT AND OLIVE RUGGELACH

1 cup unbleached, all-purpose flour, plus more for dusting
¾ teaspoon dried thyme, crumbled
¼ teaspoon kosher salt
½ teaspoon coarsely ground black pepper
8 tablespoons (1 stick) unsalted butter, softened
¼ pound (4 oz.) cream cheese, softened
1/3 cup chopped, toasted hazelnuts
1/3 cup green olives, drained, patted dry and chopped

Whisk together flour, thyme, salt and pepper in a bowl.

Beat butter and cream cheese in an electric mixer until smooth. Add the flour mixture and mix on low speed until a soft dough forms. Gather dough into a ball, divide in half and wrap each in plastic wrap. Flatten each half into a 4-inch disk. Refrigerate for at least 6 hours.


When ready to assemble, preheat oven to 350-degrees. Bring dough to room temperature (this will take about 15 to 20 minutes). In a small bowl, combine hazelnuts and olives.

Roll out one disk of dough to a 9-inch round on a well-floured board or silpat. Spread evenly with half of the hazelnut/olive mixture. Press slightly to adhere. Cut round into 16 wedges then roll up tightly, starting with the wide portion of the dough. Transfer, point side down, to a baking sheet lined with parchment or a silpat. Repeat with remaining dough.


Bake until golden brown, about 25-30 minutes. Cool, then serve warm or at room temperature.

Yield: 32 pieces

These can be assembled and stored in the freezer, unbaked.  Just make sure to wrap them well.  When ready to use, pop on a baking sheet (no need to thaw them first) and bake as directed above.  I'm hosting a small dinner party tomorrow night.  Guess what the app is going to be?

You can use any type of olive you like, but I chose nice big fat pitted green olives that had been marinated as what was termed "Italian-style."   Of course, you could also use standard pimiento-stuffed olives (who doesn't like those?) and that would be just fine.  I could also envision garlic-stuffed olives in this recipe.

On a completely unrelated subject, I'm thinking it's time to compile some kind of recipe index for this blog.  Of course, I'm totally clueless as to how to make that happen?  Any ideas, folks?  If so, please email me at elorber@gmail.com.  Thanks!

Wednesday, October 27, 2010

Hazelnuts, Continued

In my last post, I failed to mention that Henry also loves beets. Again, not my favorite, but when we were up in North Georgia recently and stumbled upon some at a local farmstand, I caved and bought a few.  Anything for Henry, right?

Of course, since I was in the middle of testing hazelnut recipes, the challenge then became how to pair them with beets.  Well, why not?  A beet salad with goat cheese and candied walnuts is certainly not unheard of.

But the idea of candied hazelnuts did not excite me.  Nor did yet another variation on a beet and goat cheese salad.  I perused a few cookbooks.  Nothing.

Then I picked up my copy of "The Zuni Cafe Cookbook" by Judy Rodgers.  (This book was published in 2002 and it is a treasure.  If you can get your hands on it, I would strongly advise adding it to your library).  I came across her recipe for Watercress Salad with Beets and Walnut-Mascarpone Crostini.  Hmmm....

I replaced the watercress with arugula (because that's what I had on hand and I couldn't find watercress anyway) and the walnuts with hazelnuts.  Here is the delicious result:


ROASTED BEETS WITH ARUGULA AND HAZELNUT-MASCARPONE CROSTINI
(adapted from "The Zuni Cafe Cookbook" by Judy Rodgers)

For the beets:
1 lb. whole, fresh beets
Salt and freshly ground black pepper to taste
2 tablespoons red wine vinegar
2 tablespoons balsamic vinegar
3 tablespoons extra virgin olive oil
4 cups arugula leaves, washed and dried

Preheat oven to 375-degrees. Scrub beets well and trim both ends. Place in a baking dish and add enough water to come up to ¼-inch. Cover tightly with aluminum foil and bake until beets are tender, about 35 – 45 minutes, depending upon size of beets. Test for doneness by inserting a skewer or cake tester into the center of a beet. Remove from oven and leave covered for about 5 minutes to finish cooking. Let cool briefly until they are easily handled.


Rub or peel skins from beets (it’s a good idea to wear plastic gloves if you have them so your hands won’t turn purple). Trim ends again and slice beets into wedges. Place in a bowl and dress with salt and pepper, red wine vinegar, balsamic vinegar and olive oil. Let marinate 10 minutes, then add arugula. Toss gently and taste to adjust seasoning. Place in serving bowls or plates and garnish with the crostini.

For the crostini:
8 small baguette slices, toasted
½ cup mascarpone cheese
½ cup chopped, toasted hazelnuts

Spread each bread slice with mascarpone and sprinkle with the chopped hazelnuts.

Serves 4

As you know, I am a salt freak and it is a rare day when I don't use it.  My instinct was to sprinkle a little over the crostini but I resisted the impulse and I was right.  The richness of the mascarpone paired with the sweetness and crunchiness of the hazelnuts was subtle and perfect - and it would have been ruined by the added salt.  Trust me on this one!

Tuesday, October 26, 2010

Hazelnuts for Henry


There isn't much Henry won't eat (except for maple syrup   ...   really, Henry?) but he does have a few favorites, like duck (not my fave) and capers.  He would probably eat cardboard if capers were involved.  He would also walk through fire for hazelnuts, which are the subject of this post.

A friend of mine who lives in Oregon recently lamented the fact that she couldn't find Georgia pecans.  I responded by sending her a bag and she reciprocated by sending me these big beautiful hazelnuts from Oregon.  Already skinned, no less!  Everyone should have a friend like this - thanks, Carol!

Now when you're given a gift like this, you don't want to bury it in your freezer, to be unearthed in a couple of years when those hazelnuts will be hard little dried-out pebbles with no flavor.  Heck no!  Instead you set yourself immediately upon the task of using them in everything you can think of.  Sooner rather than later. 

Let's start with a tart.  As you know, chocolate and hazelnuts are a match made in heaven and this (heavenly) creation does full justice to that.  I would even go so far as to say this would be worth it even if you had to skin all of the hazelnuts yourself!


CHOCOLATE HAZELNUT TART (adapted from Giada DiLaurentis)
  
For the crust:
1 1/2 cups all-purpose unbleached flour
1/4 teaspoon salt
9 tablespoons unsalted butter, chilled and cut into 9 pieces
3 to 5 tablespoons ice water

Place flour and salt in food processor and process for about 10 seconds. Place butter evenly over flour and process until it resembles coarse meal, about 15 to 20 seconds. With processor running, pour 3 T. of the water in a small steady stream through the feed tube and process just until dough comes together. Add a little more water if needed until it just forms a smooth ball.

Remove from processor and knead for several turns then flatten into a disk, wrap in plastic and refrigerate for at least 30 minutes.

Roll out onto floured board and ease into a greased tart pan.  Trim edges and refrigerate at least 30 minutes before proceeding with recipe.

Yield: enough dough for one single crust 9-inch pie

For the pie:
1/2 cup granulated sugar
2 T. all-purpose unbleached flour
3 extra-large eggs
1 1/2 cups peeled and chopped hazelnuts
1 1/2 cups bittersweet chocolate chips (or chunks)
1 cup light corn syrup
2 T. butter, melted
2 teaspoons pure vanilla extract
1/4 teaspoon salt

Mix all of the ingredients and pour into an unbaked pie crust. Preheat oven to 325-degrees and bake for about 45 minutes, until slightly puffed in center and golden brown. Let cool for 30 minutes before serving.

Serves 8 - 10


BTW, this pie crust recipe (not from Giada) is the one I have used for years.  It's pretty much foolproof, so don't be afraid to try it.

One down, three more (hazelnut recipes) to go!

Wednesday, October 20, 2010

Weekend Food, Continued


As much as I enjoy cooking on Saturday afternoons, on Sundays ... well, not so much.  As you know, we take those ridiculous long walks (link to post about that is below) and by the time we stagger in the door around 5pm, it's all I can do to drag myself into the shower.  The last thing I want to do is head to the kitchen. 

http://nevertrustaskinnycook1.blogspot.com/2009/09/5000-miles.html

So usually we will just eat leftovers, order out or hit the local pasta joint in our 'hood.  That would be Saba, which caters mostly to Emory students.  An arugula salad, a bowl of steaming pasta, a bottle of cheap red wine and we're happy campers.

http://www.saba-restaurant.com/

Maybe it was that candy corn which addled my brain, but I got the bright idea to SKIP the walk this past Sunday and head for a movie.  Visions of popcorn danced in my head, I guess.  Of course, I could barely eat it once I got engrossed in the movie, "Waiting for Superman."

http://www.waitingforsuperman.com/

This is a film everyone should see, but you will not leave the theater feeling uplifted.  You will be thoughtful, grateful that your own kids were able to obtain good educations and you will ask yourself what you can do to make a difference.  I encourage you to see it.

After that, we came home and I flipped the channel to "Sixty Minutes" where the topic was the issue of our homeless veterans.  An issue close to my heart as I volunteer at the VA hospital here in Atlanta (and I used to run a homeless shelter). 

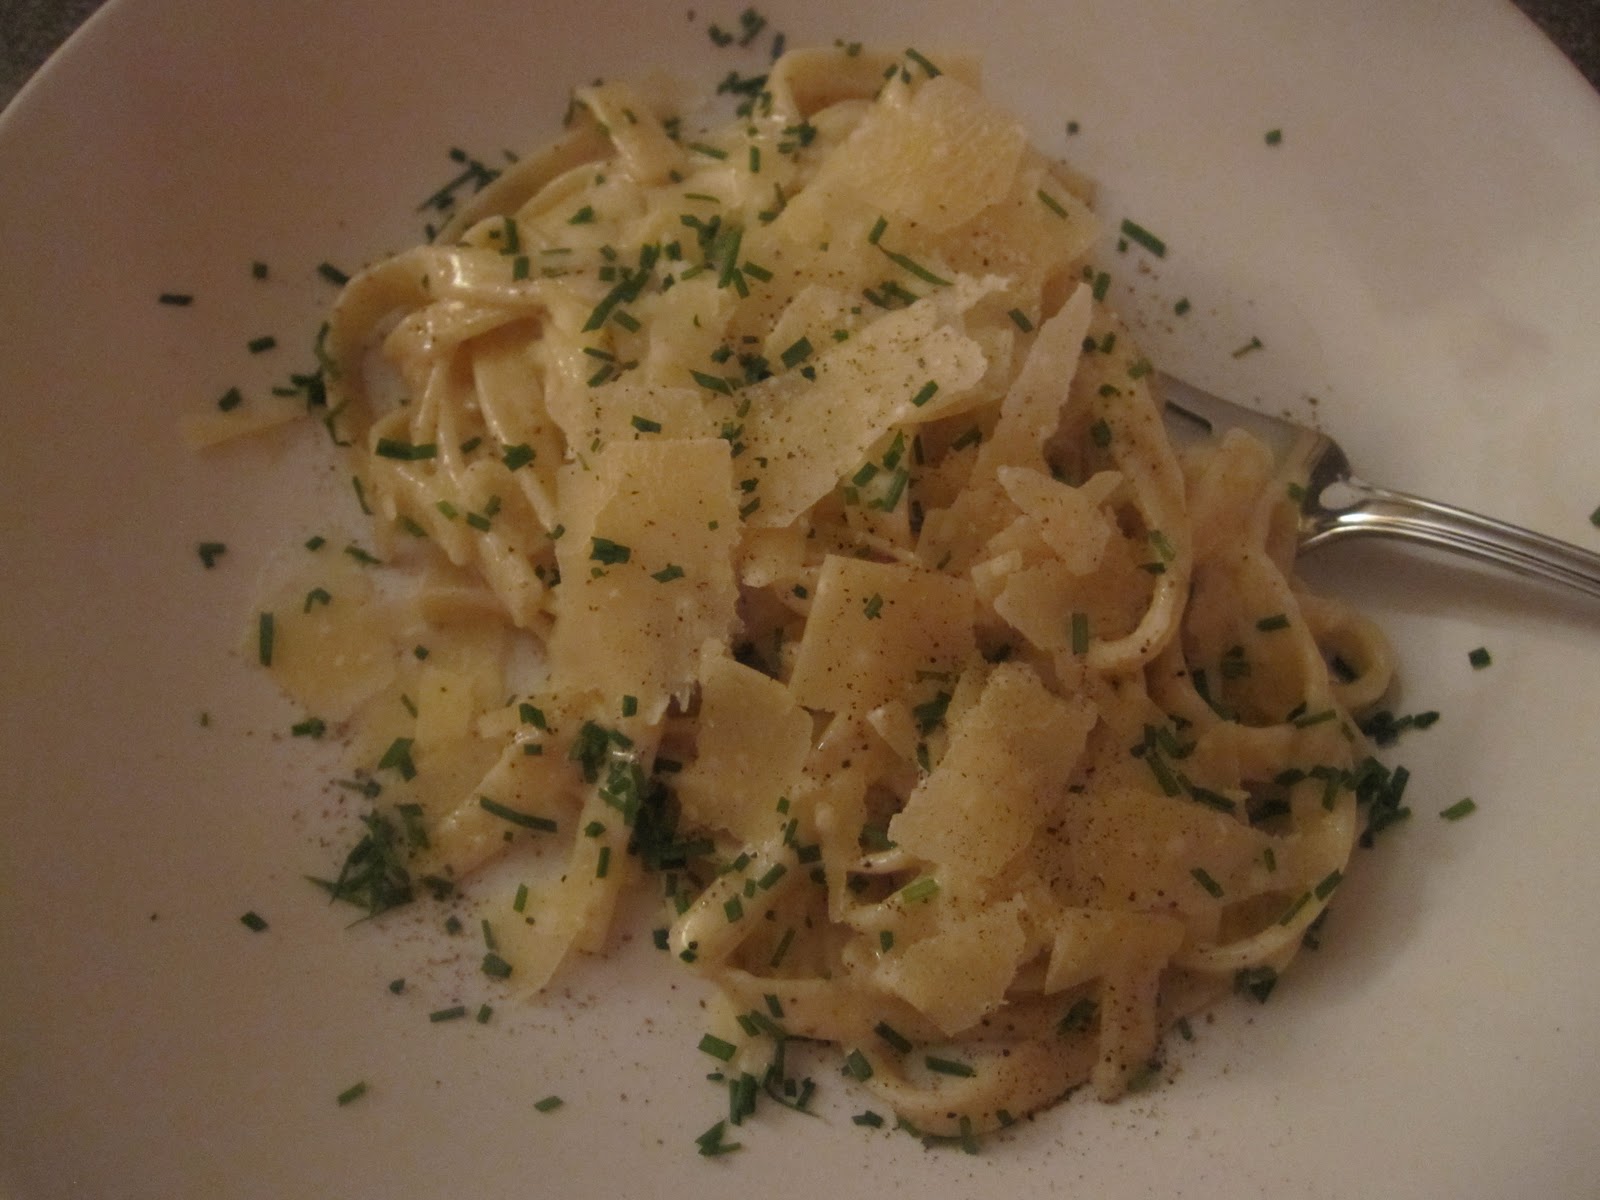
Suffice it to say, comfort food was in order.  I turned to my recently-cleaned-out pantry and pulled out a box of fettucine.  Not whole wheat, either - the real deal.  I remembered Ina Garten's recipe for pasta with truffle butter.  I remembered that container of truffle butter in my fridge.  Screw the calories.


PASTA WITH TRUFFLE BUTTER    (from Ina Garten's "Back to Basics")

Kosher salt
1/2 cup heavy cream
3 oz. truffle butter*
Salt and freshly ground black pepper to taste
8 oz. fettucine
3 tablespoons chopped fresh chives
3 oz. Parmigiano Reggiano, shaved with a vegetable peeler

Add 1 tablespoon of salt to a large pot of water and bring to a boil.

Meanwhile, in a large saute pan, heat the cream over medium heat until it simmers.  Add the truffle butter, salt and pepper and reduce heat to low.  Stir until the butter melts, then keep warm over very low heat.


Add the pasta to the boiling water and cook until just tender to the bite.  Reserve 1 cup of the pasta water then drain the pasta.  Add the pasta to the saute pan and toss well to coat.  As the pasta absorbs the sauce, add as much of the reserved cooking water as necessary to keep the pasta very creamy.

Serve in shallow pasta bowls and top each with a generous sprinkling of chives and shaved Parmigiano Reggiano. 


Yield:  2 to 4 servings

*I bought my truffle butter locally, but here's a link to find it:  http://trufflebutter.org/

You can't eat pasta with truffle butter and not think about those deserving kids who don't have the opportunity for a quality education or those homeless veterans who are recently returned from Iraq and Afghanistan.  Maybe if we can all just make a difference in the life of just one of them.......

Monday, October 18, 2010

Weekend Food

My idea of a perfect Saturday goes something like this:  hit the gym in the morning for a step or spin class, get sweaty and exhausted, come home, shower, go out for a nice lunch with Henry, run a few errands, wander around Whole Foods or Fresh Market to decide what's for dinner then come home and cook while watching the Food Network and/or old reruns of "The Sopranos."  Exciting life, huh?

But that's when I enjoy my (crappy) kitchen most - when I can take my time and make what I feel like, as opposed to throwing together a quick weeknight dinner.  In the case of this past Saturday, that meant crabcakes!


As usual, I got overly ambitious and decided to make a chocolate hazelnut pie as well (for an upcoming hazelnut blog post, stay tuned).  Oops, but what happened to the pie crust dough I thought I had in the freezer?  Oh wait - I threw it out a few weeks ago.  That meant making and chilling a brand new batch and by the time I got the thing in the oven, it was almost 7:30.  Oops, again.

So dinner may have been a little late that evening, but it was worth waiting for.  I served those lovely crab cakes with silky mashed potatoes and lightly steamed baby carrots with butter and fresh dill.  We polished off a bottle of Hendry rose, sat outside on our front porch and declared that we would definitely order this again.


These are the crabcakes we used to make when I worked at Watershed.  It comes from Scott Peacock and the recipe is in his book with Edna Lewis, "The Gift of Southern Cooking."  The quantities I use here are slightly different from the ones called for in his book, but this stretches the recipe a little bit and the results are equally as tasty (at least I think so).  I always make the entire recipe which yields 12 crabcakes so I can keep some in my freezer.  Then I can trot them out for a quick weeknight dinner or give myself a break from Saturday cooking and take a nap instead!

CRABCAKES

1 small loaf good quality bakery white bread, unsliced
1 pound lump crabmeat, carefully picked over
1 medium onion (preferably Vidalia), finely chopped
1 bunch scallions, white and green parts, thinly sliced then minced
Juice of 1 lemon
4 eggs, lightly beaten
1/2 cup melted unsalted butter
Kosher salt, freshly ground black pepper and ground cayenne to taste
3 T. vegetable or canola oil
1 T. unsalted butter

Trim crusts from bread and cut bread into 1-inch chunks.  Place on a baking sheet in one layer and bake in an oven preheated to 350-degrees for 15-20 minutes until just golden, turning once.  Set aside to cool, then grind to fine crumbs in a food processor.  Measure out 2 cups and set aside.

In a large bowl, combine the crabmeat, chopped onion, minced scallions, lemon juice, eggs and butter.  Stir in the reserved 2 cups of bread crumbs.  Season to taste with salt, pepper and cayenne.  Mix lightly with your hands until all ingredients are incorporated but do not overhandle.

Scoop out mixture and form lightly into cakes.  (I used a 2 1/2 oz. ice cream scoop for this).  Place on a baking sheet and refrigerate for at least 30 minutes.

In a large saute pan, heat oil and butter over medium heat.  When pan is hot, add desired number of crabcakes and cook until just golden on one side (about 4 minutes) then turn and brown on the other side.  Serve immediately with lots of lemon wedges and (my recommendation) mashed potatoes.

Yield:  12 crabcakes

As I mentioned, you can freeze any crabcakes you don't use for another time.  Same goes for the bread crumbs - keep them in a ZipLoc bag in your freezer and use them as needed for other dishes.

Saturday, October 16, 2010

Yes, I Did!


Went and did it today, in spite of all my talk about local, fresh ingredients with integrity.  The devil made me do it.   IT would be a bag of candy corn.  Yes, I bought it.  Even ate some of it.   IN THE CAR!!!!!.  You realize of course, this stuff is available only once a year.  It was a choice between that or those little candy pumpkins.  Candy corn won out.  Woo Hoo!!!!!

Skinny cook, Liz?  Guess not.

On a more serious note, I am working on some good "blog-worthy" material.  Stuff like crabcakes and things involving hazelnuts.  Chocolate cake, too.  More to follow, I promise.

For now, though, I just didn't want you to think I was AWOL. 

Enjoy the rest of your weekend.  Know that I am still out here, cooking and photographing for you.  Recipes forthcoming.  I'll be enjoying the rest of my candy corn in the interim.

BTW, Barbara from MA - you made my day with your post!

Wednesday, October 13, 2010

I Need a Drink


Remember the recent post about my little dinner party?  What I forgot to tell you about was the Vodka Lemonade we inhaled sipped while devouring savoring those radishes and that popcorn. 

It's been a day.  One I would rather not repeat, and it didn't even involve electrical things gone awry.  It was made even more difficult by the fact that I stayed up last night until the wee hours watching the miraculous rescue of those Chilean miners.  If that doesn't make you believe anything is possible, well then, probably nothing will.  Anyway.....

I stumbled in the door this evening, marveled at the fact that my dogs had been captives in the kitchen all day without a single accident (another miracle) and remembered that container of Vodka Lemonade in my freezer. 

Suffice it to say, my day got better.

VODKA LEMONADE

1 cup (packed) fresh mint leaves, torn
1 cup granulated (preferably superfine) sugar
8 large lemons, zested and juiced
1 1/2 cups vodka

Combine mint, sugar, lemon zest and juice in a large bowl and stir to combine.  Add vodka and refrigerate at least 1 hour, but preferably overnight.

Strain mixture.  Pour into martini glasses and garnish with a sprig of fresh mint, if desired. 

Serves one six

Any leftovers can be placed in the freezer for one of "those days."  Of course, there won't be any leftovers, so who are we really kidding here?

Friday, October 8, 2010

Complete Fake-Out


I am not a vegetarian.  Oh, I'll admit that I once was - a very long time ago - for a very short time.  It had something to do with prepping raw chicken for 500 back in my catering days.  But eventually I succumbed again to the dark side, back to burgers, rib-eyes and that old favorite, bacon.

Several weeks ago we were working on that "cookbook I can't tell you about" and when the photo shoot was done, we gorged ourselves on wood-roasted fois gras with figs and beautifully grilled dry-aged steaks.  Pig heaven (well, more like goose and cow).  Thank goodness my (non-existent) scruples didn't get in the way of the fabulous-ness on that table!

Still, I can be content with just vegetables in front of me.  I can't think of any I don't like, and they are constant visitors to my dinner plate.  Particularly if they are roasted.  Did you know that roasted brussels sprouts are almost as good as french fries?  (In truth, they are just a vehicle for salt).  Roasted cauliflower is pretty awesome, too.  Or a whole head of cauliflower microwaved for 10 minutes then slathered all over with dijon mustard, topped with shredded sharp cheddar and nuked again for about a minute until the cheese melts.  That's what I made last night and I will admit to polishing off the leftovers for breakfast this morning. 

So I am never unhappy when invited to my vegetarian friend's house for dinner (Linda, you know who you are).  She is a great cook and she has taught me a few tricks, like her lentil loaf and vegetarian chili.

And that is what I want to share with you - Linda's Vegetarian Chili.  It's delicious, it's healthy and no one will ever know it's meatless, unless you tell them.  I made a big batch of it the other day (remember, it's autumn and I'm into that kind of cooking), served it to Henry and he didn't have a clue.  Guess I should have kept my mouth shut.


I like it served over rice with a dollop of sour cream.  In my nod to trying to become a skinny cook one of these days, I served it over brown rice (cooked with chicken stock, so much for my veggie efforts) with a spoonful of nonfat, local "Greek" yogurt.  Virtuous, yet delicious.

This recipe makes a lot, but do what I did:  eat it for dinner, save enough for a couple of lunches at home and freeze the rest.  You'll be glad you did when you drag it out on a cold winter's evening and can enjoy it without any real cooking that night.  A glass of decent red wine with it won't hurt, either.


LINDA'S VEGETARIAN CHILI

3 tablespoons olive oil
2 onions, chopped
8 stalks celery, chopped
2 red peppers, chopped
2 green peppers, chopped
3/4 lbs. mushrooms, rough chopped
4 cloves garlic, chopped
2 28-oz. cans diced tomatoes
2 15-oz. cans kidney beans, drained and rinsed
Kosher salt and freshly ground black pepper to taste
Red pepper flakes, to taste
1 tablespoon chili powder
1 1/2 tablespoons ground cumin
1/4 teaspoon cinnamon
1 tablespoon dried basil
1/2 tablespoon dried oregano
1/2 tablespoon marjoram
2 12-oz. bags Morningstar Farms "meat" crumbles
1 12-oz. bottle of beer (I used Heineken), optional
Cooked brown rice and greek yogurt or sour cream for serving

Heat the olive oil in a large pot or dutch oven over medium-high heat.  Add onions and celery and saute until fragrant and vegetables start to soften.  Add red and green peppers and continue to cook until peppers start to soften.  At this point, it is a good idea to season well with salt and pepper.

Add mushrooms (portobellos or criminis are good for this dish as they are "meaty") and garlic; continue to cook for 5 minutes more or until mushrooms start to give off their juice.  Add tomatoes and kidney beans then season to taste with more salt and pepper, the red pepper flakes, chili powder, cumin, cinnamon, basil, oregano and marjoram.  When mixture starts to bubble, add the crumbles, cover the pot and lower the heat.  Simmer until chili thickens slightly and flavors start to meld, about 30 minutes, stirring frequently so chili doesn't scorch on the bottom of the pot. 

Add the beer, if using, and continue to cook, uncovered, until most of the alcohol evaporates, about 20 minutes.  Taste to adjust seasonings and serve in a large bowl over (brown) rice and a dollop of yogurt or sour cream.

 
Serves 12
Now don't turn up your nose at those Morningstar Farms "meat" crumbles.  They give this chili the right texture and just think of all the fat and calories you're saving!  You will find them in the freezer section of your grocery store.  If you just can't bring yourself to use them, you could always substitute ground bison for a low-fat meat version of this dish.  Your choice!


Since we are heading to Hugh Acheson's new restaurant in Atlanta tonight for dinner, I'm thinking my lunch today will be a nice bowl of this guilt-free chili!  I'll make up for it tonight, I'm sure!

http://empirestatesouth.com/