Sunday, July 24, 2011

Two Words


Bacon.  Crackers. 

Baked together into crispy, porky, salty, crunchy deliciousness.

How did I manage to miss this for the past twenty years?

I stumbled across this recipe recently in what's left of the weekly Food Section of our Atlanta Journal-Constitution.  (Actually, calling this a recipe is somewhat of a stretch as it requires only two ingredients and is a snap to make).  Since I was getting ready to host a casual dinner party, it caught my eye because it sounded easy (as in a complete no-brainer) and tasty.  So I whipped up a batch, served them to my guests and watched them disappear.  Quickly, I might add.

Now I don't know the origin of this (someone just screwing around in the kitchen, no doubt), but when I took a batch to one of my foodie friends and his eighty-ish-something (dynamic) mother, she talked animatedly about serving these at cocktail parties back in the day.  A quick Google search revealed multiple recipes and variations with several statements that these had been around for years.

Given my interest in retro recipes, I would love to know if any of you have ever heard of these.  Maybe your mom made them?  Your grandmother, perhaps?  Let me know, please.

In the meantime, I will leave you with the "recipe" which recently appeared in the AJC, from Mississippi author Martha Hall Foose's book "A Southerly Course."  Make these for your next cocktail party, or make them just for yourself.  You might feel guilty, but you won't be sorry!

Henry is neither guilt-ridden or sorry.
He's just relieved the Food Police are on vacation!

BACON CRACKERS  (adapted from Martha Hall Foose)

15 strips of bacon (preferably applewood-smoked)
45 buttery crackers (such as Waverly Wafers)

Preheat oven to 250-degrees.  Place a baking rack over a sheet pan and coat very lightly with cooking spray. 

Slice bacon strips into thirds.  Wrap each cracker with a piece of the sliced bacon, then place seam side down on the prepared rack.

Bake for 1 1/2 hours or until bacon is thoroughly cooked through.  Remove from oven and cool completely.

Serve immediately or store for up to 1 day in an airtight container.

Yield:  45 crackers or enough to feed one (once you devour eat one, you'll see what I mean)


*  When you  procure your bacon, make sure it isn't thick-cut.  Thinner slices will wrap more easily around your crackers.

*  Speaking of crackers, make sure you avoid those with trans fats.  I used Whole Foods 365 brand and it worked quite well.  Also, I prefer rectangular crackers for this, but if you need to use round or oval ones, have at it.  The end result will taste the same (and you will still eat too many of them).

*  While you can make these ahead, I think they are better if you serve them as soon as you have made and cooled them.  Nonetheless, I would happily consume more than my fair share ...even if they are a day old!

*  Folks, this is trash food at its best.  Please forgive me for my lack of  food integrity here!

Wednesday, July 13, 2011

Rat-a-Tat-Tat


Grrrr.  It's been a bitch of a day.  We are not winning the war against the rats in our back yard  (I refuse to give up my bird feeders) and they keep showing up to taunt us.  We tried rat poison, but one of my dogs found it instead.  Fortunately I was out there with her and realized what was happening.  I washed her mouth out, called my vet and the dog is fine but is now on mega-doses of vitamin K.  Oh, the drama!

Henry is all about the rat traps out there.  When I stumbled into the kitchen the other morning, desperate for coffee, I was greeted with his proud proclamation that he had managed to snare one of the critters.  Oy veh.  Too much information.

Then my computer crashed today and I lost more data than I care to think about.

To add insult to injury, I have a doctor's appointment next week AND I HAVE TO GET WEIGHED.  Just kill me now, please.

Now I know this isn't cancer (been there, done that) so I really can't complain, but sometimes you just want to throw a pity party for yourself.  Care to join me?

Remember that dinner party I created recently  for my friend?  I made amazing Salty, Crunchy Peanut Butter Brownies for him.  After a day like today, I'm wondering why I didn't keep any of them for myself.  I could certainly use a hit of chocolate and peanut butter right now. 

Here's the recipe.  I am contemplating whipping up a batch this very moment.  Just sayin'.....


CRUNCHY, SALTY PEANUT BUTTER BROWNIES   (adapted from Anne Thornton)

For the brownies:

Make Liz’s brownie recipe.

http://nevertrustaskinnycook1.blogspot.com/2010/06/lizs-dump-it-in-pan-quick-and-dirty.html

For the peanut butter layer:
1 cup creamy peanut butter (I used Jiff)
2 oz. (1/2 stick) unsalted butter, room temperature
1 cup powdered sugar
¼ teaspoon fine sea salt
2 T. half-and-half
1 teaspoon pure vanilla extract
1 12-oz. can salted peanuts

For the topping:
1 11-oz. bag 60% chocolate chips
4 oz. (I stick) unsalted butter

Bake brownies as directed in my recipe. Set aside to cool.

Meanwhile, make the peanut butter layer. Place peanut butter and butter in the bowl of an electric mixer. Beat well to blend, then add powdered sugar and sea salt. Beat well, scraping down sides until mixture is smooth. Add half-and-half and vanilla and combine.

Spread this mixture evenly over the cooled brownies. Scatter the peanuts evenly over the top, pressing down lightly. Set aside.

For the topping, melt the chocolate chips and butter together in a small saucepan over low heat, stirring constantly. Cool for 10 minutes, then pour over the peanut butter layer, smoothing evenly with an offset spatula. Chill until set, at least 2 hours or preferably overnight.

Remove from pan and cut into squares.

Yield:  enough to serve 16  (if you are generous) or 1 if you are stingy, self-absorbed and don't give a rat's ass about the calories and fat grams.  Your call.

Thursday, July 7, 2011

Do Yourself a Favor


There are certain recipes that I simply cannot make. Oh, not because they are too difficult or because I can’t find the ingredients or because I can’t figure them out. Nope, it’s because if I make them and keep them in the house for more than two seconds, I will eat every last scrap with no holds barred. Stuff that falls in this category would include mac & cheese, mashed potatoes (I’ll inhale them even if they are stone-cold), those deviled eggs with capers I made recently and my favorite bacon-studded potato salad. Skinny cook, anyone?

http://nevertrustaskinnycook1.blogspot.com/2011/03/guilty-pleasure.html

http://nevertrustaskinnycook1.blogspot.com/2011/04/eggs-cheese-fat-salt-your-basic-food.html

This potato salad was part of my “Second of July” menu and it is an adaptation of the one we made at Watershed. I loved when it was my job to make it at the restaurant because, of course, you have to keep tasting until you get it right, yes?

I won’t dignify that with an answer.

This is one of those recipes where the sum is greater than the whole of its parts. It’s simple, straightforward and you won’t need a plethora of ingredients. The only difficult part will be restraining yourself from eating the leftovers in your refrigerator. If you are like me, do yourself a favor and don’t make this. Your thighs will thank you.

BACON-STUDDED POTATO SALAD  (adapted from Watershed and Chef Scott Peacock)

1 # bacon (I prefer applewood-smoked)
4# new potatoes
2 T. salt
¼ cup cider vinegar
4 cups chopped scallions (about 4 bunches)
1 ½ cups mayonnaise
1 ½ cups sour cream

Preheat oven to 350-degrees. Place a rack over a baking sheet and lay bacon strips over. (You will probably need to do this in two batches). Place in oven and bake for 20-25 minutes or until bacon strips are crispy. Remove bacon to a plate lined with paper towels to drain excess grease, then roughly chop. Reserve bacon drippings from pan.

 Slice potatoes in half (or quarters if they are large) and place in a heavy pot. Cover with water and add the 2 T. salt and the cider vinegar. Bring to a boil, then reduce heat and simmer until potatoes are just tender, 25-30 minutes. Drain potatoes well then place in a large bowl. Pour one half of the reserved bacon fat over (keep remaining for another use) and season with 1 teaspoon salt and ½ teaspoon freshly ground black pepper. Stir in the chopped scallions and bacon.

Whisk mayonnaise and sour cream in a bowl until smooth. Pour half of it over potato mixture and stir gently to blend. Season with salt and pepper to taste. You will probably need to add more of the mayonnaise/sour cream mixture but add only enough so that potato salad is moist but not liquid. Taste again to adjust seasonings.

Serves 10 - 12


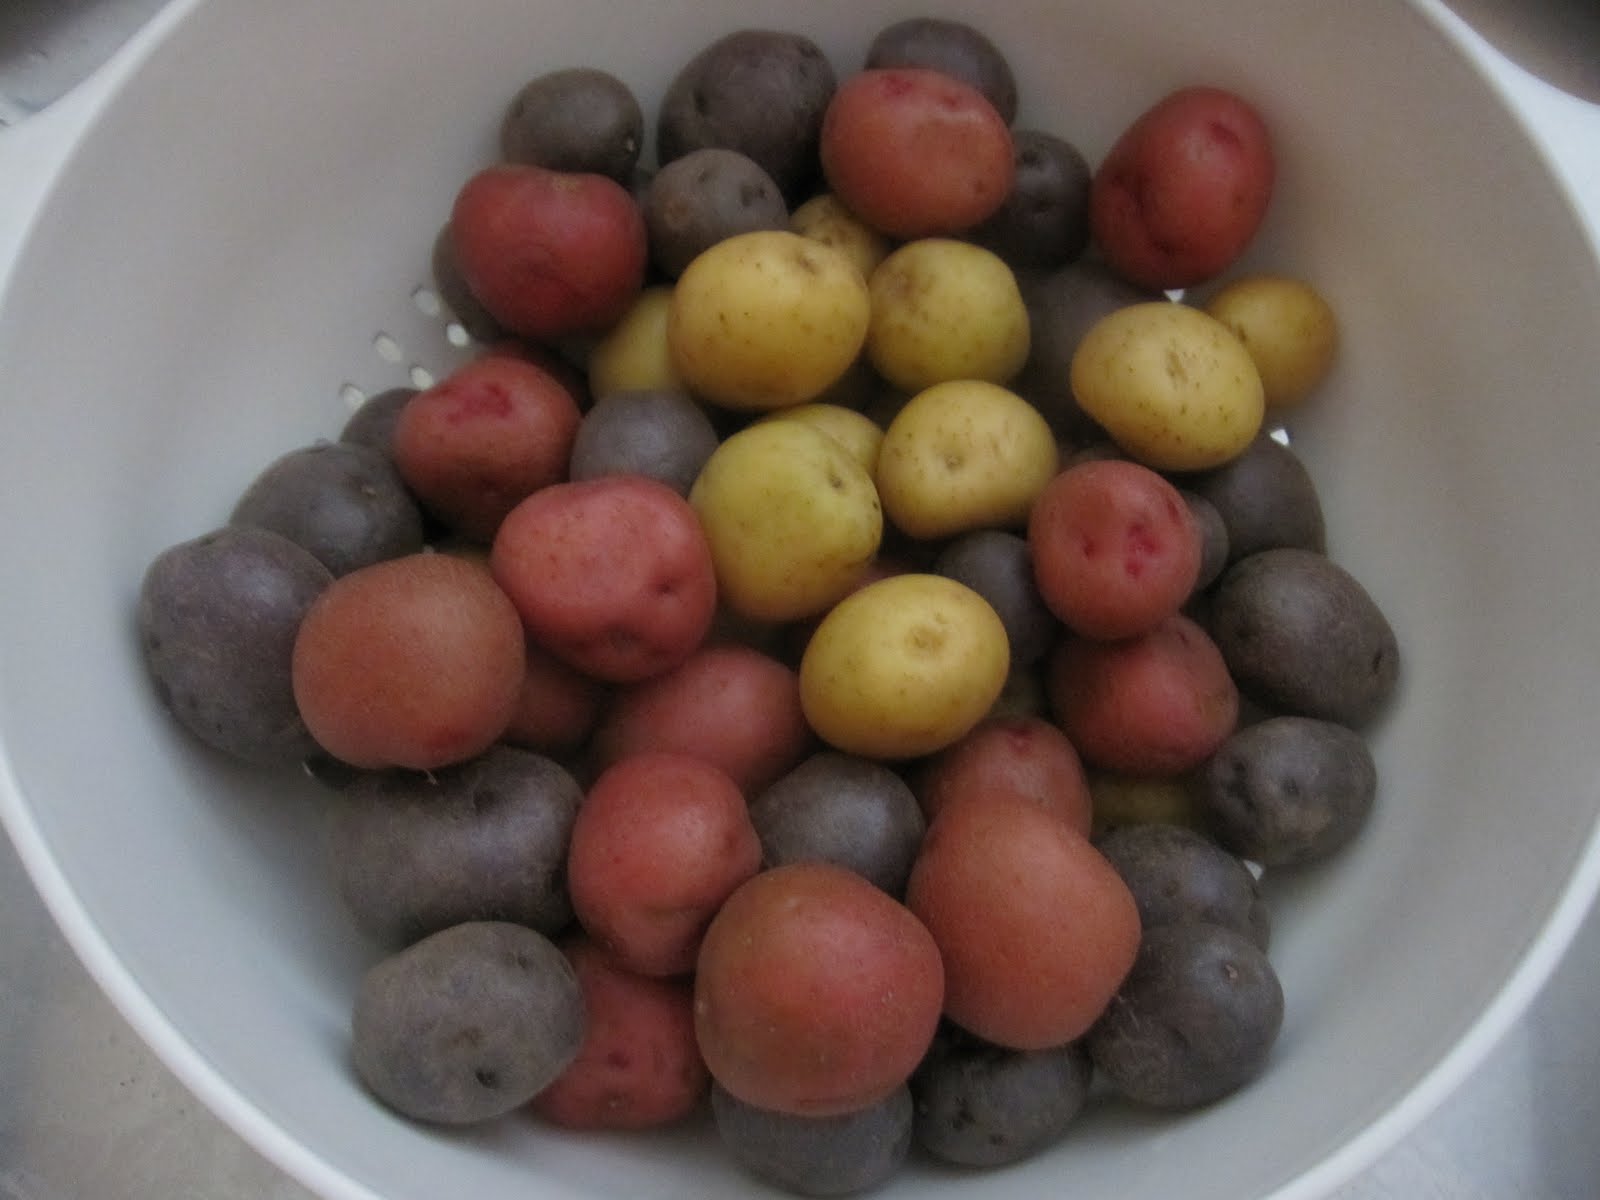
*  Use any type of small potatoes you like, but I love the combination of red and purple potatoes and yukon golds.

*  In a perfect world, you would make this with homemade mayonnaise, like we did in the restaurant.  If you live in my world however, you will be perfectly happy to use a good commercial mayonnaise, like Hellman's.  Of course, if you do want to make your own, here you go:

http://nevertrustaskinnycook1.blogspot.com/2011/05/hold-mayo.html

* As usual, Weight Watchers is beckoning.....

Sunday, July 3, 2011

Happy July 2nd!

As I write this, the date is July 3rd.   I’m guessing that many of you are currently knee-deep in prep for your barbecues tomorrow. I, however, am way ahead of you as we celebrated the holiday last night with friends who are unavailable on the actual Fourth.  So, happy cooking tomorrow and I will think of you as I take the day off.  (Well, sort of. Henry and I will be embarking on one of those 6-hour ridiculous walks in the scorching Georgia sun) . Hmmm … maybe you got the better end of this deal.

In any event, I knocked myself out for our little repast last night.  Not only did I do all the cooking but I/we schlepped everything over to our friends’ house where everyone was gathering.  Yikes, it reminded me of my old catering days – happy I’m not in that business anymore!  Fortunately, Henry is a wizard at packing and loading up a car.  We got everything over there with relative ease.  He earned a well-deserved reprieve from the food police for the evening.

Pack it all up, Lorbs Henry!

I’m not sure I did him any favors.  The food police most definitely should have been in attendance.  Short of celery sticks (to accompany pimiento cheese so that cancels it out, right?) and a beautiful platter of heirloom tomatoes, there was nothing even remotely healthy about my menu.  It's why we hit the gym in the morning and are embarking upon that walk tomorrow.

Pimiento Cheese
Celery Sticks, Ice Water Crackers

Liz’s Awesome Barbecued Pork Ribs
House-made Barbecue Sauce

Sweet Summer Corn Pudding

Baby Potato Salad
Applewood-smoked Bacon, Scallions

Heirloom Tomatoes from Sandee’s Garden
Fresh Mozzarella, Basil, Olio Santo

Toasted Country Bread
Garlic Butter

Salty, Crunchy Peanut Butter Brownies
Additional Details Not Required

I’m going to start by giving you the recipe for Sweet Summer Corn Pudding.  I would even venture so far as to say it was the hit of the evening.  Well, at least until those brownies made their appearance!

SWEET SUMMER CORN PUDDING  (adapted from Edna Lewis' and Scott Peacock's "The Gift of Southern Cooking")

8 ears fresh, sweet summer corn, husked with kernels removed
1/2 cup granulated sugar
1 tablespoon kosher salt
1/2 teaspoon freshly ground black pepper
2 tablespoons all-purpose, unbleached flour
4 extra-large eggs, beaten
2 cups whole milk
2 cups heavy cream
6 tablespoons unsalted butter, melted
1 teaspoon freshly ground nutmeg

Preheat oven to 350-degrees.  Butter a large baking dish (I used a 13 x 3-inch dish) and set aside.

Place corn into a large bowl and sprinkle in the sugar, salt, pepper and flour.  Stir lightly to combine.

In a large bowl, whisk eggs with milk and cream.  Whisk in melted butter, then nutmeg.  Pour mixture into the corn and stir well.  Pour into the prepared baking pan then place it into a larger pan filled with hot water. 

Bake in the preheated oven for 45 - 55 minutes or until golden on top and just set in the middle.  Serve warm.

Yield:  12 - 14 servings

*  I have always stripped my corn by standing it up in a pie plate, slicing it down with a sharp knife, then picking through it to remove any remaining strands of silk.  This has always worked for me, but I stumbled upon another way of doing it, so you might want to check this out:


*  Clearly I am not going to morph into a skinny cook anytime soon.  Oh well.  I would go so far as to say this meal was worth it.  Happy Fourth of July, everyone!

Tuesday, June 28, 2011

Cobble this together

Sorry I've been absent.  As I mentioned before, life intruded in a major way recently.  In spite of that, I've still been cooking and baking.  I just haven't had time to blog about it.

But now I'm back and I am here to give you two ridiculously easy "cobbler" recipes.  These are about as no-brainer as you can get, but either one will never fail to elicit smiles and requests for seconds.  Trust me on this!

Okay, so it's summer and in my book, that means desserts laden with fresh, seasonal fruit.  Since I live in Georgia, peaches are high on my hit parade.  So are blueberries and I love the combination of both.  In a perfect pastry world, I would make a crust from scratch, roll it out, sprinkle it with a little sugar and cinnamon and place it over a casserole of cut-up, lightly sugared fruit of choice then bake until golden.


Oh, but I can be SO lazy sometimes!  That means screw the pastry-making and instead default to my mom's "cobbler."  I hesitate to give you this recipe because it is so very elementary and basic, but it fits the bill when you have a plethora of frest fruit around which you have totally ignored and it is on the verge of attracting those dreaded fruit flies.  Here is the perfect solution:


BABA'S FRUIT COBBLER

2 ½ cups fruit of choice (think sliced peaches, berries, sliced apples, or any other combo)
2/3 cup granulated sugar (or less, depending upon the sweetness of your fruit) plus ¾ cup
¼ teaspoon salt
½ cup unsalted butter
¾ cup all-purpose, unbleached flour
2 teaspoons baking powder
¾ cup whole milk
1 teaspoon pure vanilla extract

Preheat oven to 350-degrees. Toss fruit with the 2/3 cup sugar and salt. Set aside.

Place butter in a 9 x 13-inch baking dish. Transfer to the preheated oven and let butter melt (about 5 minutes).

Meanwhile, combine the ¾ cup sugar, flour and baking powder in a bowl. Whisk to blend, then whisk in milk and vanilla to make a thin batter.

Remove pan from oven and pour batter over melted butter. Do not stir. Pour prepared fruit over batter. Again, do not stir.

Bake for 45 – 50 minutes or until puffed and golden and just set in center. Serve with ice cream, whipped cream or a drizzle of heavy cream, if desired.

Serves 8


This is ideally served warm, but I have been known to eat it straight from the fridge with no complaints.  It's good for breakfast, too!

Of course, when you just can't face any more fruit desserts, it's time to cut to the chase and overdose on chocolate.  Not exactly the quintessential summer dessert, but there are times when you just gotta do what you gotta do.  I made this the other day for a group of friends and it was a huge hit.  Hello, everytime I make this it's a huge hit.  Make it yourself and you'll understand why.


"ANTI-SUMMER" BROWNIE COBBLER  (adapted from Martha Stewart)

1 cup (2 sticks) unsalted butter
6 oz. semi-sweet or bittersweet (not unsweetened) chocolate chips
2 cups granulated sugar
4 eggs (I used extra-large)
1 teaspoon pure vanilla extract
¾ cup all-purpose, unbleached flour
½ teaspoon salt

Preheat oven to 350-degrees.

Butter a 10-inch baking dish. In a large, heavy saucepan, melt butter and chocolate chips. Remove from heat and whisk in sugar then eggs, one at a time. Whisk in vanilla, flour and salt.

Turn into prepared pan and bake for 45 -50 minutes or until just puffed in center. Serve with vanilla ice cream (or salted caramel ice cream or coffee ice cream, if you are like me) or softly whipped cream.

Serves 6 - 8


*  If you noticed that the pictures of the brownie cobbler don't match the quantity called for in the directions, it's because I doubled the recipe when I made and photographed it. 

*  Admittedly, these are not sophisticated recipes.  I should probably be embarassed to share them but I will sacrifice my food integrity so I can pass them on to you.  Just don't tell anyone how easy they are after you've made them (and are basking in the accolades) and don't you dare tell anyone that you got them from me!

Thursday, June 23, 2011

Life

Yeah, it just gets in the way sometimes. 

Sorry I've been absent from the blogosphere.  I'll be back in a few days, I promise.  Can't wait to tell you about my anti-summer cobbler!

In the meantime, prayers would be appreciated for my friend who has been diagnosed with congestive heart failure.  We are all rallying as best we can.

Thanks.

Thursday, June 16, 2011

Why Didn't I Think of This?


Let’s be honest. Who amongst us doesn’t like chocolate chip cookie dough? Personally, I prefer it over the finished, baked cookie. I think it has something to do with that mouth-watering butter/sugar combination and the crunch of brown sugar in the raw dough. And then of course, I believe in the old adage that if you eat it straight from the mixing bowl, it doesn’t count. Yeah right, Liz.

Keep your spoon away, Liz!

In any event, when I’m whipping up a batch of chocolate chip cookie dough, I’m always happy when there is enough of it remaining in the bowl so I can actually bake the things. C’mon, can you really look me in the eye and tell me you’ve never done the same thing?

Ben and Jerry figured this out years ago when they came up with cookie dough ice cream. Someone also decided it would be a good addition to milkshakes. Now I am going to sink to a new low and let you in on a recipe for Cookie Dough Truffles.

Since my cookie-making method usually revolves around shaping the dough into balls and storing them in my freezer until ready to bake, I can’t believe I never thought to make them into truffles. I stumbled onto the concept one recent Saturday after I had been to the gym and was waiting for Henry to get home so we could go out to lunch (that doesn’t count either after an intense workout, right?) With nothing else to do, I flipped the channel to the Food Network and there was this woman making Chocolate Chip Blondies, which she was morphing into several other desserts like Cookie Dough Truffles. Well, well, well!

Are your kids hanging around the house this summer with nothing to do? Make these with them. Except for the fact that they will likely bounce off the walls after consuming one, it’s the perfect thing to make on a sweltering day when you are loathe to fire up the oven.


COOKIE DOUGH TRUFFLES (adapted from Anne Thornton, The Food Network)

4 oz. (1 stick) unsalted butter, softened
½ cup dark brown sugar, packed
¼ cup granulated sugar
¼ teaspoon salt (I used fine sea salt)
1 cup plus 2 tablespoons unbleached, all-purpose flour
½ teaspoon baking soda
1 egg (I used extra-large)
1 teaspoon pure vanilla extract
1 ½ cups mini chocolate chips or chunks
2 12-oz. bags dark chocolate chips, preferably 60%
2 oz. white chocolate
2 oz. milk chocolate

Place butter into the bowl of an electric mixer fitted with the paddle attachment. Beat on high speed until butter is creamy, scraping down bowl once, about 2 minutes. Add sugars and salt and continue beating for about 5 minutes, scraping down bowl several times until mixture is smooth and well-blended. Try to resist the temptation to dip a spoon into it and shovel it into your mouth.

Meanwhile, in a small bowl, whisk together the flour and baking soda. Add the egg and the vanilla to the butter mixture and blend well on medium-high speed. Scrape down bowl, then reduce speed to low. Add the flour mixture in two parts and mix only until just blended. Remove bowl from mixer stand and fold in the chocolate chips (or chunks) with a heavy spatula or wooden spoon.

Pat dough into an oval and wrap well in plastic. Refrigerate until just chilled, about one hour. Use a small ice cream scoop (I used a 1 ½-inch scoop) to shape into balls. Place on a baking sheet and refrigerate at least one hour or until firm.

When ready to assemble, line a baking sheet with parchment and have ready a long skewer. Melt the chocolate chips in a small, deep pan. Use the skewer to spear a chilled cookie dough ball and dip it in the melted chocolate. Let excess drip off, then place ball on the prepared sheet, using the skewer to smooth out the top and cover the hole it made. Repeat with remaining balls, then place tray into the refrigerator for at least 30 minutes or until chocolate sets and is firm to the touch.

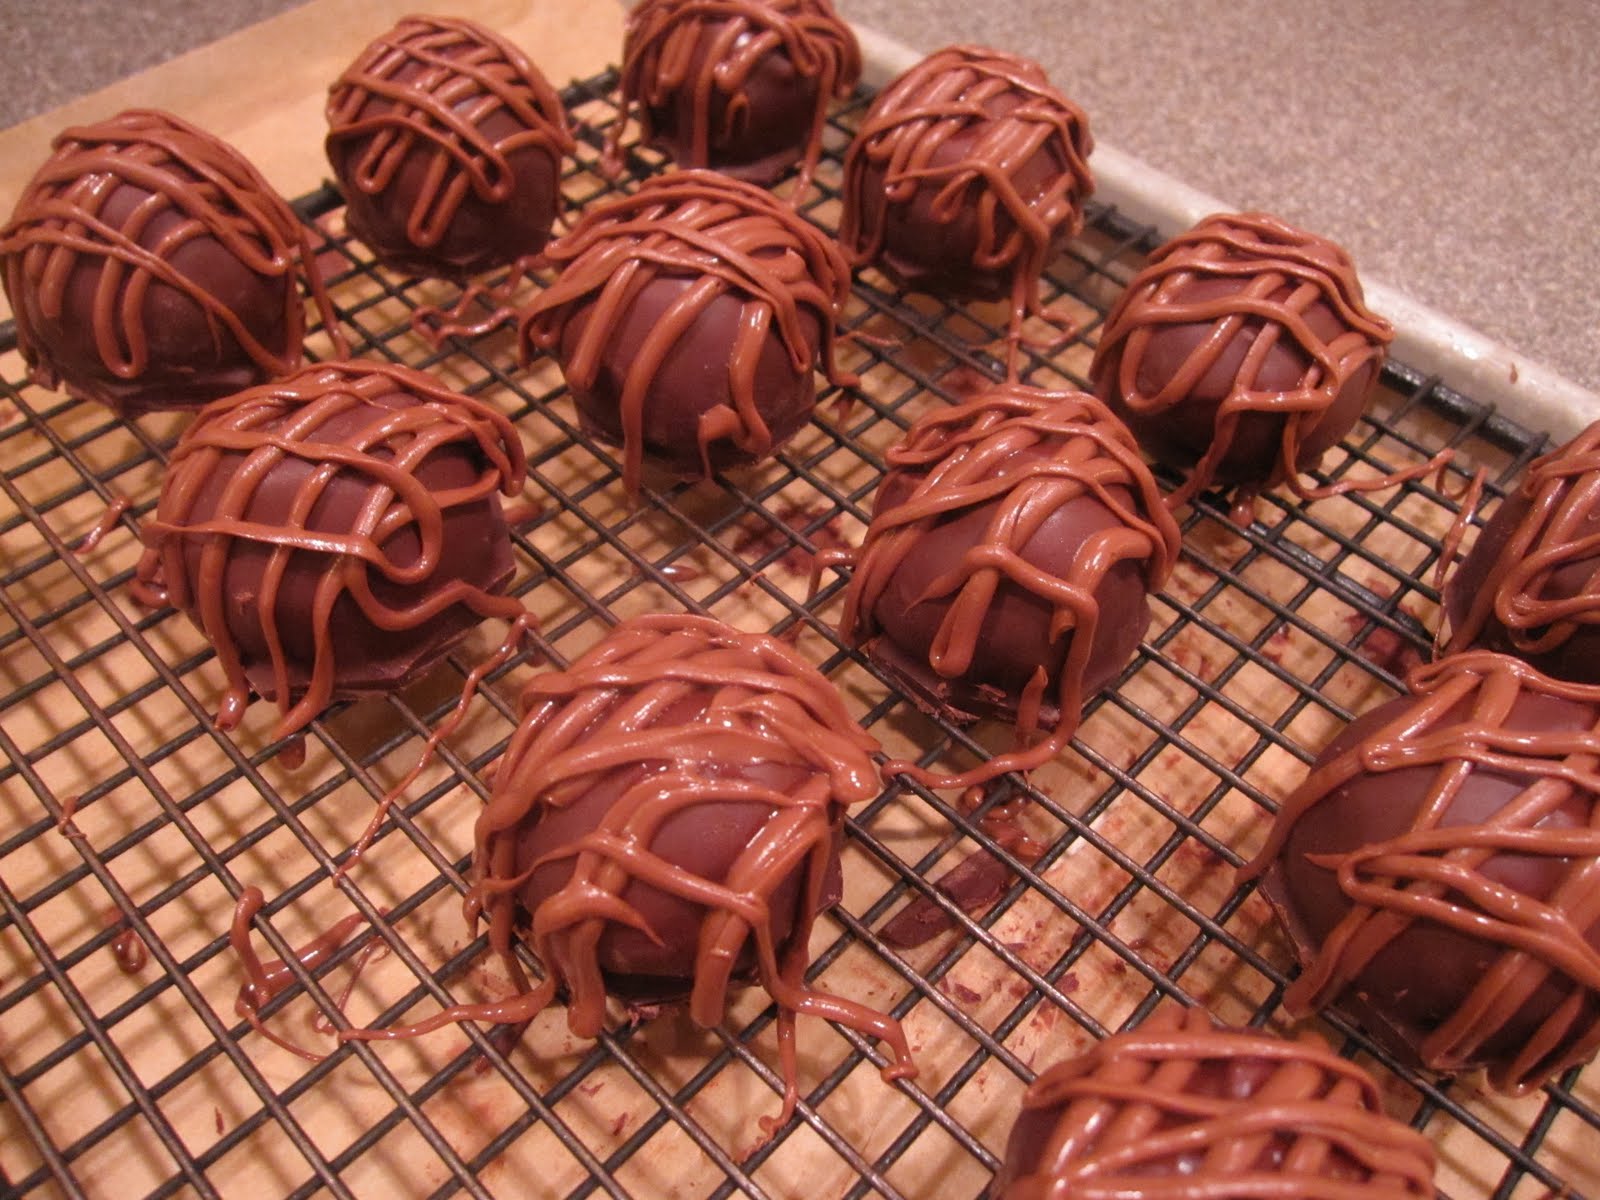
When ready to decorate, place chocolate covered balls on a cooling rack on top of a baking sheet to catch excess chocolate. Melt the white chocolate in a small saucepan over low heat. Place into a plastic pastry bag with a very small hole snipped from the end. Pipe white chocolate over half of the chocolate balls.

Repeat with the milk chocolate and decorate the remaining balls.

Yield:  26 1 ½-inch truffles


*  You will need to store these in the refrigerator, however I recommend letting them sit at room temperature for about 15 minutes before wolfing down serving. 

*  Be creative in your decorating!  Use both kinds of chocolate or roll balls in cocoa, chopped nuts, sprinkles or powdered sugar.  Let your kids decide....

*  The original recipe called for regular chocolate chips, but I think they are too big, which is why I used minis.  I think they give a better ratio of chocolate chips to dough.

*  Don't have a plastic pastry bag?  That's what Ziplocs are for.

*  When you dip the truffles in the melted chocolate, no matter how much you let the excess drip off, you will end up with a puddle of it around the truffle, which will solidify.  By all means, just leave it (means that much more chocolate) but if you are ridiculous like me, you will triim it off before decorating.  And then Henry will bemoan the waste of all those chocolate scraps...

*  I would be remiss if I didn't remind you there is a raw egg in this recipe.  If your health is compromised, you should skip this recipe altogether.  To reduce the risk of salmonella or any other food-borne illness, make sure you use only fresh, properly refrigerated and clean Grade A or AA eggs.  The more you know about where your eggs come from, the less the chance of contamination.

Well, I guess I have blown my Weight Watchers regimen for this week.  On trash food, no less........

Sigh.