Thursday, May 26, 2011

Spray What?


If you asked me what Henry does for a living, I’d be hard-pressed to give you an answer. He has re-invented himself more times than I can count and he’s done a good job of it. In my opinion, the world would be a better place if more people had his resilience, brains and compassion. Of course, I’m slightly biased.

I watched the “Oprah” finale (oh no … Oprah, what will we do without you?) and listened one final time to her mantra about how we should all find our inner passion and incorporate it into our lives. I have managed to do that, more or less, as I am all about feeding people. But what about Henry?


If you asked him what he REALLY wanted to do, he would likely admit that he would  be a butcher. Yep. He loves carving, breaking down meat and I wish you could have been there when we took a sausage-making class recently at the Pine Street Market here in the ATL. He was like a little pig in you-know-what. His sausage turned out pretty well, too.

http://pinestreetmarket.com/

In his current reality, however, he deals with the dark side of our troubled economy. He is part of a consulting firm which takes on bankrupt companies and struggling real estate. He’s good at it, but sometimes it’s a total downer, so at the end of the day, a little levity is in order.

Enter the failing company that produces “sprays” of non-sugar hits. I am not kidding. Henry brought home a box of these assorted sprays. Stuff like Sinfully Delicious Chocolate Dessert Spray, Milk Chocolate Turtle Spray, Banana Split Melted Ice Cream Spray and Key Lime Pie Dessert Spray.


I need an air sickness bag.


Are we really so debased as a society that we have to resort to this kind of garbage? I don’t mean to climb on my soapbox, but REALLY? There is something seriously wrong here if we have to rely on sugar-free, flavored sprays like this to satiate us.


Strawberry Melted Ice Cream Spray? I don’t think so! I cast my vote for a spoonful or two of the real thing, even if it means I only get to eat it occasionally and in limited portions. There is no way a quick burst of chemically flavored aerosol could ever take the place of a cool, creamy and soul-satisfying mouthful of homemade strawberry ice cream!

Here’s my recipe for the real stuff. No spraying involved.  There is a batch of it in my freezer right now, just waiting for our Memorial Day cookout.  I’m also thinking those “Reverse" Chocolate Chunk Cookies will be a good accompaniment...

http://nevertrustaskinnycook1.blogspot.com/2011/04/april-showers.html


THE REAL DEAL STRAWBERRY ICE CREAM

2 cups heavy (whipping) cream
2 cups half-and-half or whole milk
1 cup granulated sugar, divided
Pinch of salt
7 egg yolks
2 teaspoons pure vanilla extract
1 lb. fresh strawberries (about 18 large), stemmed and hulled

Combine cream and half-and-half in a large saucepan over medium heat. Stir in ¾ cup of the sugar and the salt. Heat until sugar is dissolved and mixture is just warm but not simmering.

Whisk egg yolks and vanilla extract together in a separate bowl. Whisk in 1 cup of the warm cream mixture to bring up the temperature. Pour this into the remaining cream in the pan and stir well. Cook over medium heat, stirring frequently, until mixture thickens and temperature reaches 165-degrees on an instant-read thermometer. Remove from heat immediately and strain into a heatproof bowl. Let cool slightly, then place a piece of plastic wrap directly on the surface to prevent a skin from forming. Refrigerate until well-chilled, preferably overnight.

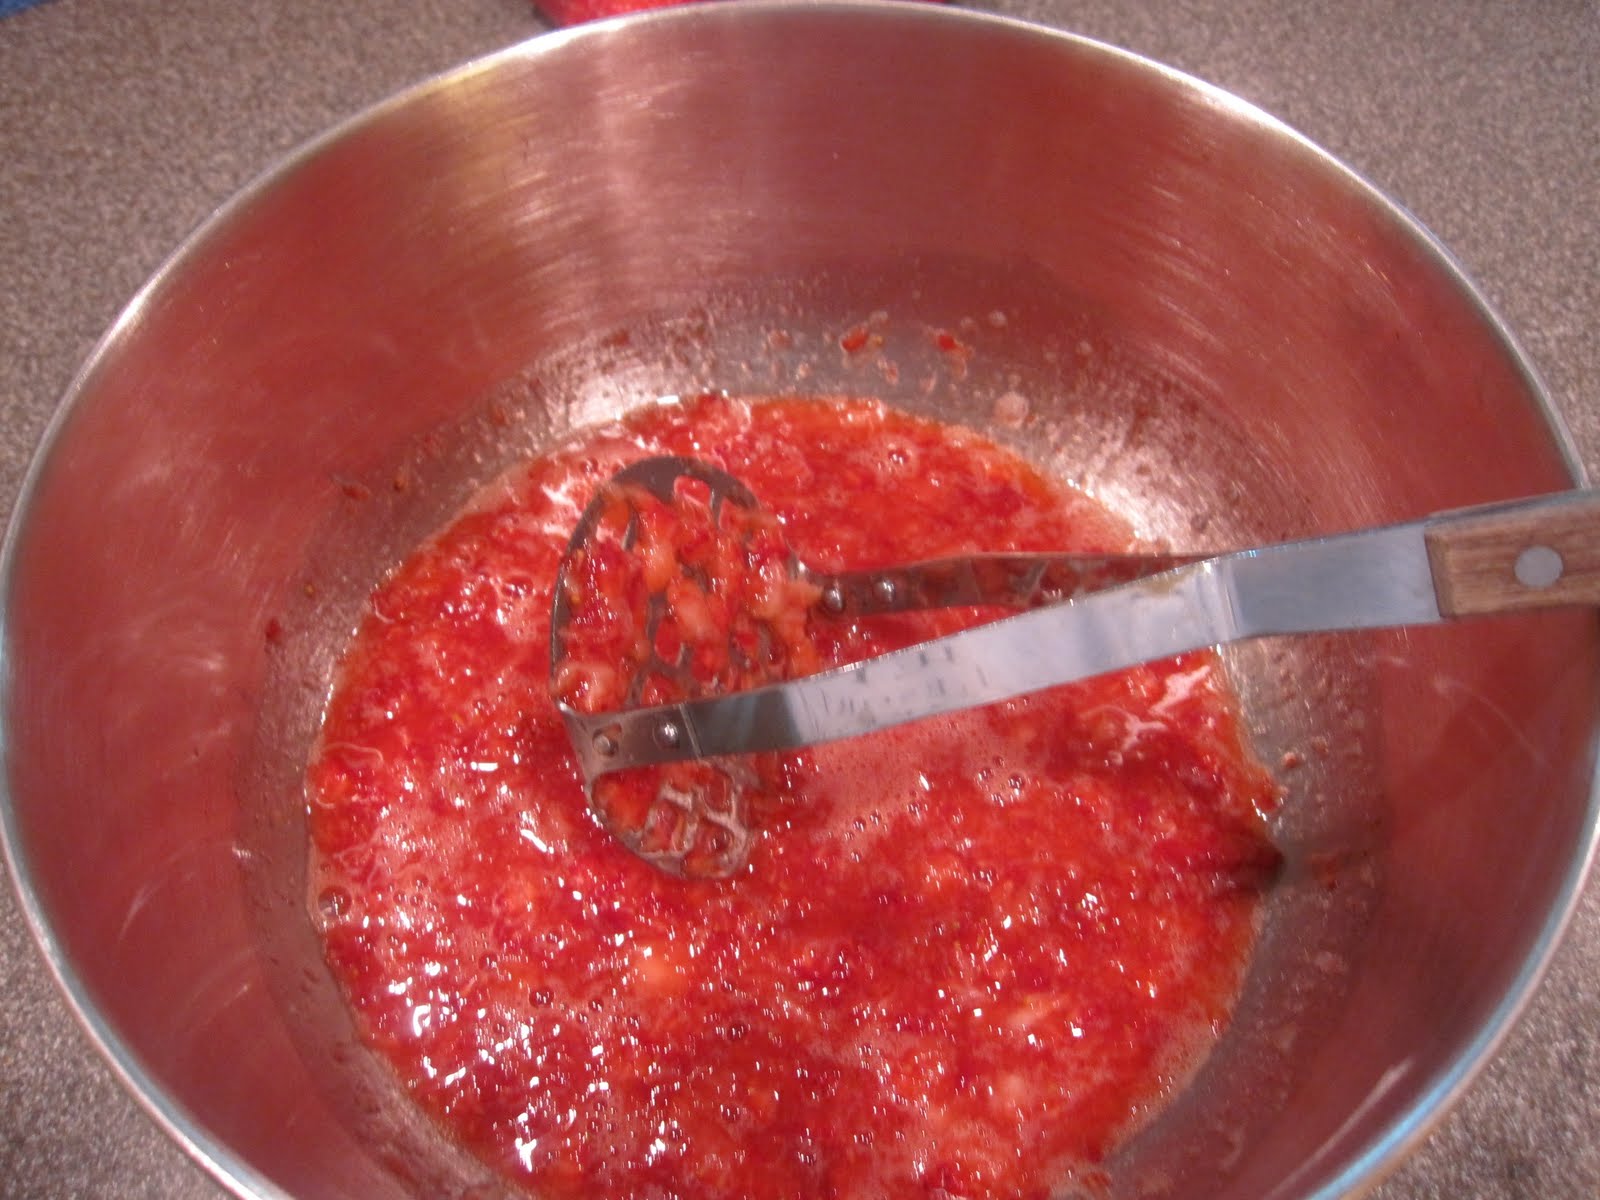
Divide berries in half. Place half in a mixing bowl along with the remaining ¼ cup of granulated sugar. Use a potato masher or fork to mash into a wet paste. Quarter the rest of the berries and slice thinly. Combine with the mashed berries. Stir this into the chilled custard.

Place into an ice cream maker and freeze according to manufacturer’s directions.

Yield: approximately 1 quart


*  I like this recipe because it isn't too sweet, allowing the flavor of the strawberries to shine.  You may need to adjust the amount of sugar, depending upon the sweetness of your berries.

*  I subscribe to the theory that if you're going to indulge, it should be in the best thing possible.  That's why I use half-and-half along with the cream in the custard mixture.  If you absolutely must, you can substitute whole milk for the half-and-half, but your finished product won't be as good.

*  Be careful not to overcook the cream/egg mixture.  Eggs will cook at 180-degrees so it is wise to invest in an instant-read thermometer to avoid ending up with a mess of sweetened scrambled eggs.  Also, don't skip the step of straining the cooked custard.  Even if you take it off the heat at exactly 165-degrees, it is still likely to contain some pieces of cooked egg.

I rest my case.

*  If you are in a big hurry and want to chill the custard mixture quickly, place the bowl  into a larger bowl filled with ice cubes.  Put the whole thing in the refrigerator without placing the plastic wrap over the top and stir with a spatula, scraping sides, every 15 minutes or so.  It should be ready for the ice cream freezer in about 2 hours.

*  After you have stemmed your strawberries, please take the time to hull them as well.  That means running a small knife around the top to remove the flavorless white part just below.  This gives more flavor and intensity to your strawberry ice cream.


*  Lastly, I have to give myself a pat on the back.  After I scooped some of the ice cream into a bowl for that final beauty shot, I PUT IT BACK IN THE CONTAINER WITHOUT EATING ANY OF IT!  Way to go, Liz!  Here's the proof:

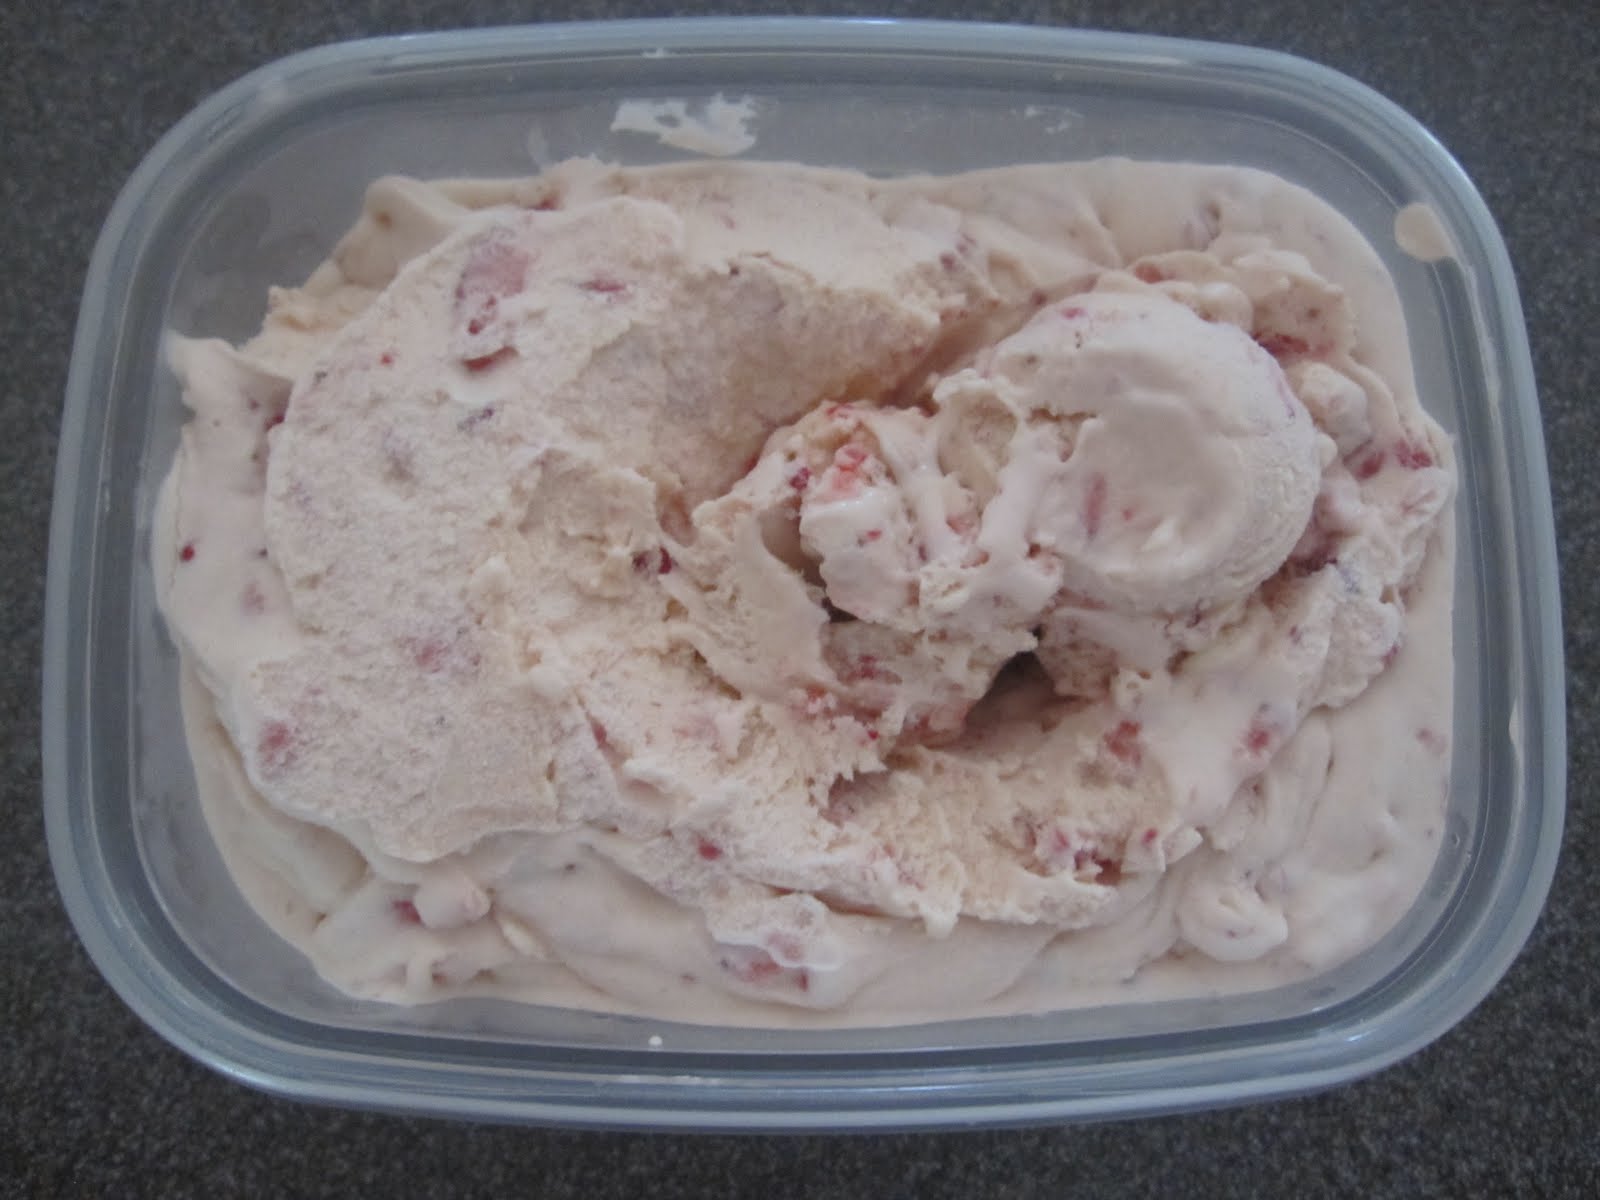
See?  I took a hit of the spray instead!
(Just kidding)

Thursday, May 19, 2011

Southern Hospitality

Nothin’ says lovin’ like somethin’ from the oven.”

Anyone remember that old Pillsbury commercial or am I really, really dating myself here?

Don’t answer that.

Don’t worry, I’m not resorting to biscuits from one of those cans you crack open on the countertop (or anything else equally disgusting like processed cheese, garlic-in-a-jar, bottled lemon juice, canned asparagus, mint jelly or Vienna sausages). No, I'm talking about what we believe down here in the South which is “nothing says Southern Hospitality like cheese straws.”


Do you remember the movie “Annie Hall?” It’s probably my favorite film of all time because it mirrors my relationship with Henry's New York family versus my southern, wasp-y one. The best scene in the movie is when Woody Allen and Diane Keaton are seated at the dinner table with her parents and someone comments that the greatest sin in their family is to raise one’s voice at the table. Woody counters that the greatest sin in his family is to pay retail. My reality, captured on film.


We do have our share of quirkiness down here in the South. We wouldn’t say sh_t if we had a mouthful and we are notorious for keeping secrets hidden under the rugs, so to speak. We are infinitely polite and to this day, some of us still say “ma’am” and “sir.” I do not exaggerate.

But we are fanatics about our Southern Hospitality and there is nothing we won’t do to welcome you into our homes and make you feel like a rock star (or maybe a renowned gospel singer) when you walk through our front doors. It would not be a surprise if we have a big pitcher of “sweet tea” waiting in the fridge and we stand ready to rustle up something to feed you in a New York minute (sorry, couldn’t resist). We want you to feel comfortable, we want you to feel at home and we never, ever want you to think you are intruding.  Even if you are.

This explains why we keep a stash of unbaked cheese straws in our freezers. You show up unexpectedly, we dash to the freezer, pop them into the oven and before you know it, these savory little morsels are placed in front of you and you can’t resist.

What, no mint juleps?

CHEESE STRAWS  (adapted slightly from "The Gift of Southern Cooking" by Scott Peacock and Edna Lewis)

1 2/3 cups all purpose, unbleached flour
1½ teaspoons kosher salt
1 teaspoon dry mustard
½ teaspoon cayenne pepper
½ cup unsalted butter, cut into pieces
8 oz. extra-sharp cheddar cheese, grated
2 tablespoons water

Preheat oven to 425-degrees.

Sift together the flour, salt, dry mustard and cayenne pepper. Put the butter and grated cheese in a large mixing bowl and mix until thoroughly blended. Gradually add the dry ingredients to the butter and cheese and mix until completely incorporated. Add the water and mix for one minute more.

Turn the dough out onto a lightly floured surface and knead five or six times. Roll the dough out to a ¼-inch thickness. Cut into strips ¼-inch wide and 4 to 6 inches in length. Place strips on ungreased cookie sheets ½-inch apart and bake in the preheated oven for 12-16 minutes until golden brown and crisp.

Cool completely on a baking rack and store in airtight containers.

Yield: approximately 4 dozen pieces


*  Extra-sharp cheddar is essential for this recipe.  The sharper, the better.  Anything less than that will result in a cheese straw with no taste.

*  I use more salt and a little more cayenne than called for in Scott and Edna's recipe.  Let your palate be your guide, adding more or less to suit your taste.

*  In the interest of full disclosure, I doubled the recipe when I made and photographed it.  That's because I was making them for that baby shower last month and I wanted extras to store in my freezer for unexpected guests.  Gotta stay true to those Southern Hospitality tenets!  And yes, this recipe is easily doubled.

*  Speaking of freezing, these can go directly from freezer to oven.  That's actually not good news because you can drag out a few, throw them in your toaster oven and have freshly baked cheese straws anytime you want them.  What was that about becoming a skinny cook?

*  The original recipe also doesn't specify how to mix all of the ingredients, but knowing Miss Edna as I did, I can promise you that she never used an electric mixer.  I'm sure she used her trusty wooden spoon to blend everything together.  I, however, have no such scruples, so I used my electric mixer.  Your choice.

*  Obviously you can cut these into any size or shape you want.  I have been known to shape the dough into logs, wrap well in plastic, then chill and cut into 1/4-inch slices.  I then top each one with a pecan half, sprinkle with coarse sea salt and bake.  Dee-licious!

*  Betcha can't eat just one!


Saturday, May 14, 2011

Belly Up to the Bar


Oh, the days when we used to frequent those singles bars!


But now that I'm an old lady (sigh), my bars these days revolve around the cookie variety instead.

Bar cookies have been around forever - in fact, I’ll bet you have fond memories of the ones your mom made when you were a kid. I certainly do. My mom’s Coconut Bars were off the charts in my estimation and her Chocolate Chip Bars weren’t far behind (sure hope I never find out she made them from a box). Oh, and do you remember those 7-Layer Bars which were made with everything but the kitchen sink, including chocolate chips, coconut, nuts, condensed milk and butterscotch chips? I have an old recipe that refers to these things as Heart Attack Cookie Bars. Yep.


That old bald man I live with has a penchant for rhubarb. I would say it ranks up there with capers as one of his favorite things (as opposed to maple syrup which he abhors). Can’t say I agree with him (except for capers) as I adore good maple syrup and am somewhat ambivalent about rhubarb. Nonetheless, when it shows up every spring, I buy it for him and sauté it with butter, brown sugar and cinnamon until it is reduced to a stew-y mess that he can eat for breakfast, topped off with yogurt. Have at it, Henry. The stuff is safe from me!


I cannot say the same for Rhubarb Crumb Bars, however. Of course, since they are made with a delicious streusel, along with cream cheese and sour cream, what’s not to like? Even if you don’t love rhubarb. Trust me, people!

RHUBARB CRUMB BARS (adapted from Mary Evans)

For the crust:
6 tablespoons unsalted butter, room temperature
¾ cup light brown sugar, packed
¾ cup all-purpose, unbleached flour
½ cup rolled oats, either old-fashioned or quick-cooking
½ teaspoon kosher salt
½ teaspoon ground cinnamon

Preheat oven to 350-degrees. Line a 9-inch square baking pan with heavy duty foil to overhang sides and grease well.

In electric mixer fitted with the paddle attachment, beat butter until smooth. Add sugar and beat until fluffy and well-blended, scraping down sides of the bowl several times. With mixer on low speed, add flour, oats, salt and cinnamon and mix until just combined.

Reserve ½ cup of the mixture and press remaining firmly into the prepared pan in an even layer. Bake for 10 minutes until it just starts to firm up. Do not overbake. Remove from oven and let cool slightly.

For the filling:
8 oz. cream cheese, room temperature
½ cup granulated sugar
½ cup sour cream
2 eggs (I used extra-large)
1 teaspoon pure vanilla extract or vanilla paste
2 teaspoons grated fresh ginger root
¼ teaspoon kosher salt
3 cups fresh rhubarb (4 – 6 stalks, trimmed), cut into ½-inch pieces

Wipe bowl of electric mixer clean. Add cream cheese and beat with paddle attachment until fluffy. Add sugar and beat until smooth, scraping down bowl several times. Beat in sour cream, then eggs one at a time. Add vanilla, ginger root and salt.

Layer rhubarb over cooled crust. Pour cream cheese mixture over and use a small spatula to even it out and reach the corners. Place in oven and bake for 20 minutes then remove from oven and sprinkle reserved crumb mixture evenly over top. Return to oven and bake for another 15 – 20 minutes or until just set.

Remove to a baking rack and cool to room temperature, then refrigerate several hours or overnight. Using foil handles, remove from pan and cut into bars.

Yield: 16 2-inch squares


*  If you are like me, you will occasionally buy fresh ginger root and store it in the vegetable bin in your refrigerator.  Then you will forget it's in there and when you finally remember, it has shriveled up and turned moldy in places and you will be thoroughly ticked off because you don't want to make a run to the store JUST FOR FRESH GINGER!  Instead, store it in a plastic bag in the freezer and it will be ready when you are.  Just grate up what you need and return what's left to the freezer. Works everytime!

I have never met a Lemon Bar I didn’t like. Oh sure, some are better than others; to me it depends upon the tartness of the lemon in contrast to the sweet, flaky crust. I use the recipe that we made at Star Provisions and I swear by it. Hope I don’t get in trouble by giving you the recipe! Shhhh…….

   
CARLA’S LEMON BARS
For the crust:
3 cups all-purpose, unbleached flour
1 cup confectioner’s sugar
12 oz. cold butter, diced

Preheat oven to 350-degrees. Line a 13 x 9 x 2-inch baking pan with heavy duty foil to overhang sides. Butter foil or coat with cooking spray.

Place flour and confectioner’s sugar in the bowl of a food processor and process briefly to blend. Distribute butter over top and process until mixture is just combined and crumbly. Press into the prepared pan, then place in oven and bake for 20 minutes until just set but not browned or cracked. Remove from oven and cool.

For the topping:
2/3 cup all-purpose, unbleached flour
4 cups granulated sugar
Pinch of salt
8 eggs (I used extra-large)
2 tablespoons lemon zest
1 ½ cups fresh lemon juice (8 – 12 lemons)

Place flour, sugar and salt into a large mixing bowl and blend with a large whisk. Whisk in eggs, then lemon zest and lemon juice until mixture is smooth. Pour over cooled crust and bake for 20 to 25 minutes or until just set. Do not overbake. Mixture should be set but still slightly wobbly in the center, but not browned or cracked. Remove to a rack to cool, then refrigerate several hours or overnight until well-chilled.

To serve, remove from pan, using foil handles. Place on a cutting board and cut into squares as desired. Sprinkle with confectioner’s sugar before serving.

Yield: 64 1 ½-inch small squares


*  Carla Tomasko is the pastry chef at Bacchanalia and Quinones Room here in Atlanta.  She is as sweet as she is talented and you won't find better desserts anywhere in this city.  You can trust me on that one, too!

*  By the way, if you were wondering why I haven't posted anything recently, it's because Blogger was down for several days recently.  I couldn't believe it!  Quite a shock to try and access the site, only to see the message "Blogger not available."  Nothing like a forced "blogcation."  Sorry about that!


Wednesday, May 4, 2011

Hold the Mayo


Or not. Depends upon what you are slathering it upon. Corned beef or pastrami sandwiches on rye … well not so much, unless you are my mother. Take her into any good deli and she will inevitably order corned beef on white bread with lettuce, tomatoes and mayonnaise. You can only imagine the horrified look on my New York born-and-bred husband’s face when she does that. Really, Mom?

That aside, there’s a lot you can do with a good dollop of homemade mayonnaise. Stir it up with some chopped fresh herbs and scallions, thin it with a little lemon juice and serve it up with a nice piece of grilled fish. Combine it with a healthy dose of horseradish (preferably the homemade variety) and maybe a little sour cream and give your steak a big wallop of flavor. Add some garlic and turn it into an aioli for shrimp or grilled vegetables. Do something similar with a hit of pesto.  Or, have yourself a retro little salad by blending mayonnaise and ketchup into a thousand island dressing, then spooning it over a big wedge of chilled iceberg lettuce.

What would a BLT be without mayo? Dry and boring, that’s what. Potato salad? Deviled eggs? Pimiento cheese? I'll stop ranting now.

So without further ado, here is a recipe for mayonnaise. Try it just once and you’ll never go back to those processed versions (sorry, Hellman’s). Like most of what I post here, it’s ridiculously easy and it will live for several weeks in your fridge, giving you lots of time to experiment. Oh, and just think how impressed your friends and family will be!


MAYONNAISE  (adapted from Scott Peacock's "The Gift of Southern Cooking"

1 tablespoon cider vinegar
1 tablespoon freshly squeezed lemon juice
1 teaspoon sea salt
1 teaspoon dry mustard
2 egg yolks (I use extra-large)
1 1/2 cups peanut or canola oil
1 tablespoon hot water

Place the vinegar, lemon juice, sea salt and mustard into the bowl of an electric mixer fitted with the whisk attachment.  Blend briefly until dissolved, then add egg yolks and whisk until smooth.  While mixer is running, add the oil drop by drop at first, then in a slow stream until all of it has been incorporated and the mixture is emulsified.  Beat in the hot water until mayonnaise is smooth and creamy.

Store in the refrigerator in a tightly covered container.

Yield:  about 1 1/2 cups


*  I always make this in my electric mixer, but you can do it in a food processor instead.  You can also make it by hand with a big bowl and a balloon whisk which means you won't need to do any weight-lifting at the gym that day.

*  I know I post a lot of Scott Peacock’s recipes here, but there’s a reason for that and it's because they are trustworthy. I’ve used them in both a restaurant kitchen (Watershed) and my own home kitchen for years and I can vouch for that. I would tinker with them, but instead I will stand by that old adage “if it ain’t broke, don’t fix it.”

*   I also know some of you are going to look at this recipe and say “Oh no, this calls for raw eggs and I can’t go there.” That’s your choice, and I certainly respect that. I’ve made the choice to use organic, free-range eggs for my mayonnaise and have never had an issue. Farm fresh eggs are even better. It goes without saying that if you know where your eggs come from, the lesser the chances of contamination.   As you know from earlier posts, I think it's well worth the trouble and expense to seek out farm fresh eggs.